
When it comes to handcrafted wares, there are countless different things you can make, and of all different kinds. Many people do fine, detailed things using fabrics, flosses, and needles, but such delicate crafts aren’t for everyone. Some people like to make something that they can mold more heavily with their own hands. That’s where things like woodworking come into play. Are you interested in working with wood and even with some power tools but you’re not quite ready to take on building entire pieces of furniture? Then you’re the perfect person to start learning how to whittle.
Here are 4 little wood carving projects you can try as a beginner:
Contents
1. Viking chess piece
When you think of whittled pieces, does your mind wander to handmade games and vintage game pieces like ones you’ve seen at your grandparents home or in old farm sales? Well, we are here to show you how to make one of your own! If you enjoy it, why stop at one? Go ahead and make yourself an entire chess set!
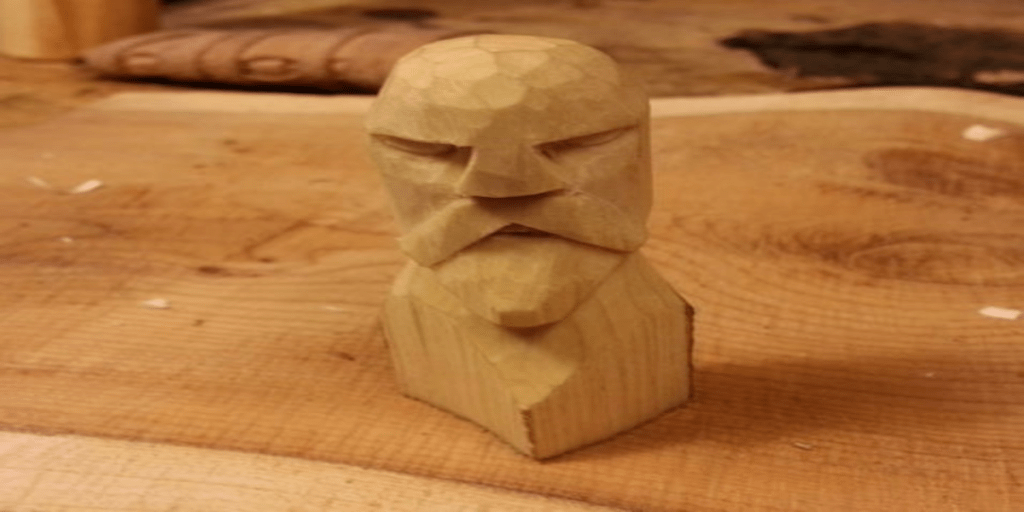
Here I will show you how to make a simple small carved figure.
STEP 1: Required Tools
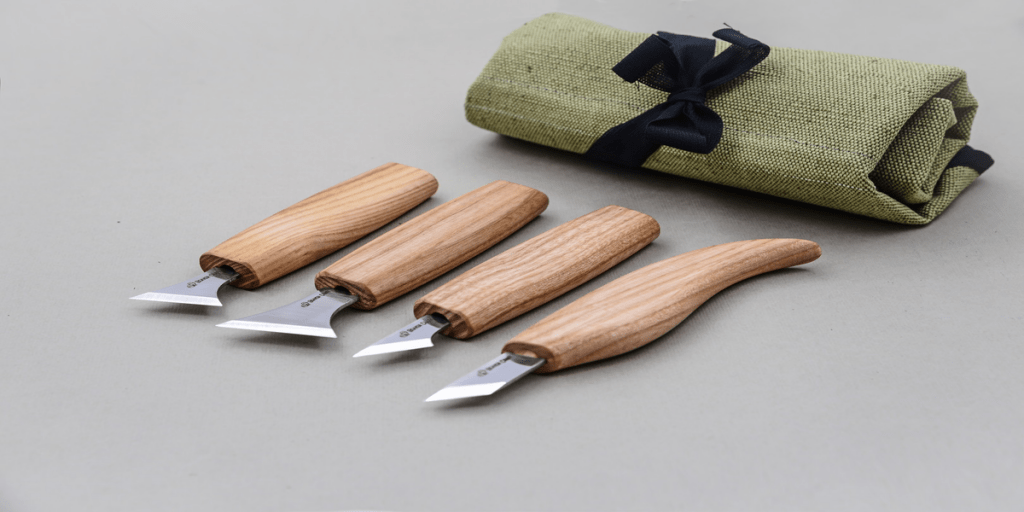
You only need a saw and a knife to make this pieces.
A small whittling knife or a chip knife is the best suited for the carving. But any small sharp knife will do the job. And a bigger knife is needed to split the wood into the 4 pieces needed.
I use my hand forged knifes and a pull saw.
If you don’t have a suitable knife already I recommend you buy a pfeil or a flexcut I have used both brands and they both very good. And they are available in many places online.
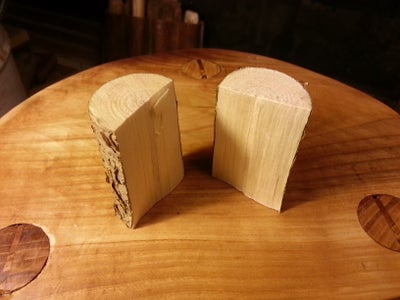
Step 2: Preparing and Splitting the Wood

Single Piece of Log Cut Into Half Cut into Quarters
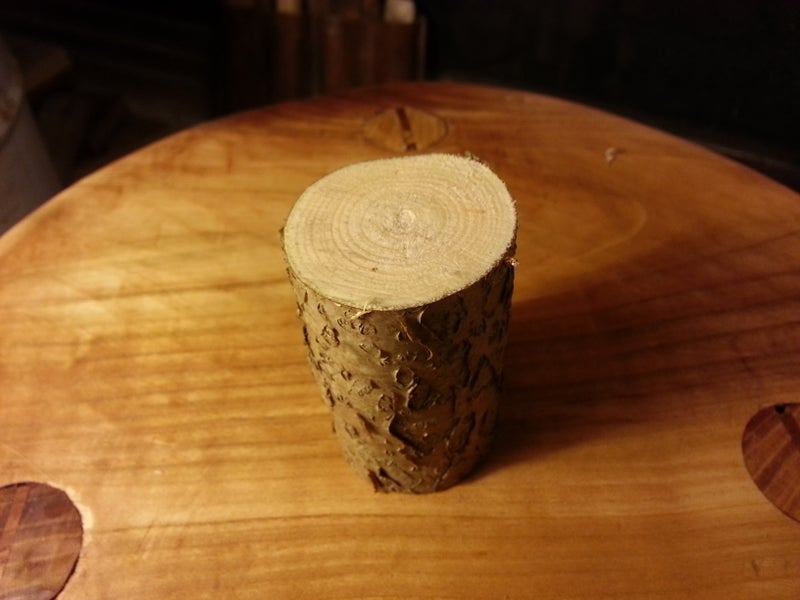
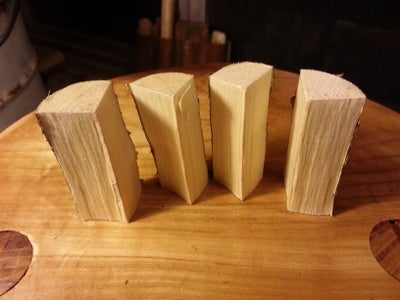
Cut a length of greenwood. I use a branch of hassle I have just cut down a few days ago. When you use green wood the carving is much easier because the wood is softer.
You can use any kind of green wood. I can recommend alder, hassle and willow for beginners. They are easy to come by, they are soft and grow straight, and therefore are easy to carve.
For the more skilled and experienced you can go for the harder kinds of wood like black cherry, apple, mayflower or maple. Or yew if you can get your hands on some.
Yew and alder are even soft and easily carved after they dry and the wood have cured.
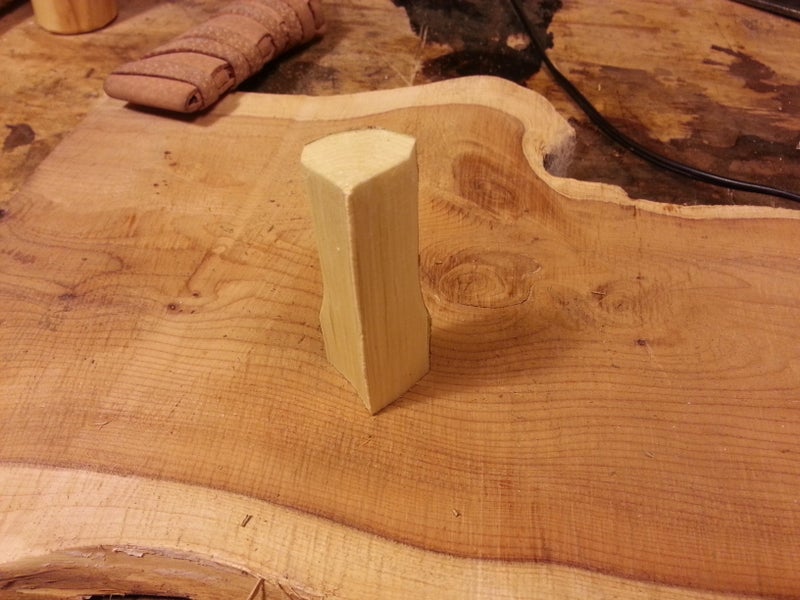
Step 3: The Rough Cuts
step 1 step 2 step 3 step 4 step 5 step
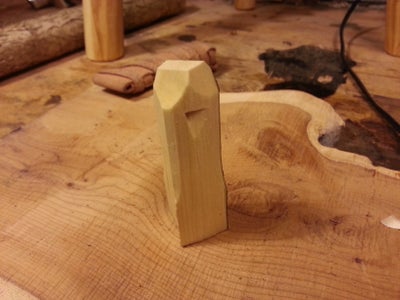

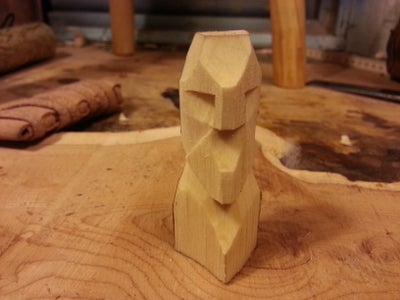
I start to shape the face and beard of the viking. I keep the cuts coarse at this stage.
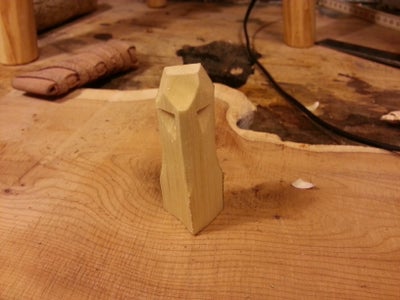
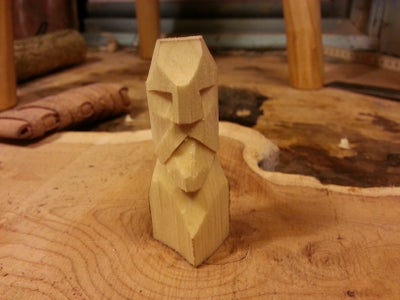
Step 4: The Fine Cuts
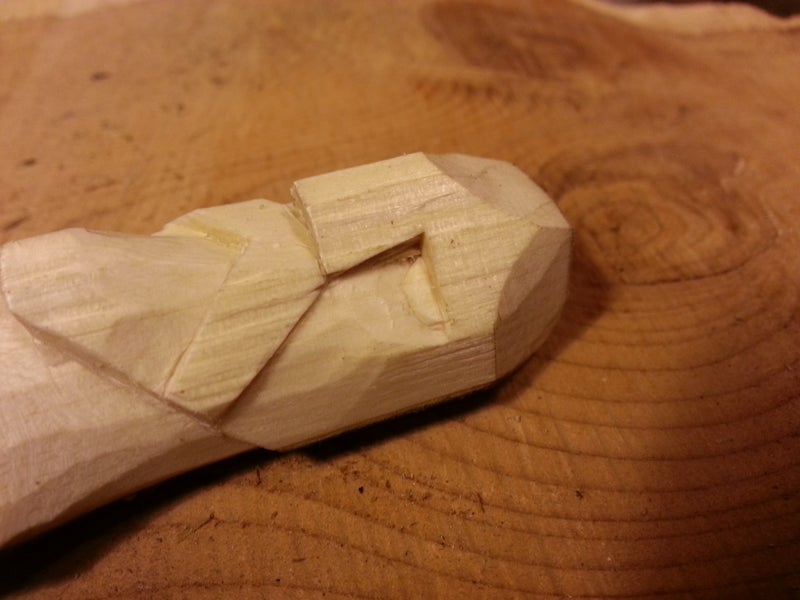
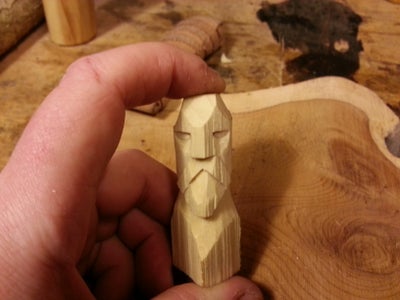
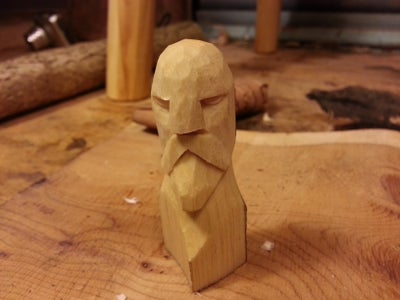
In the last steps I smoothed out the square impression and ad details like eyes and mouth.
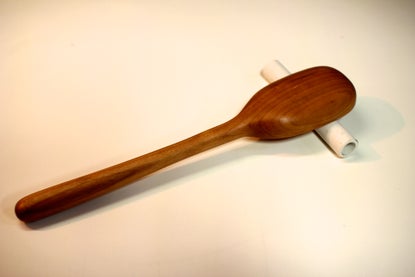
2. Simple wooden mixing spoon
Perhaps you’re very into the idea of creating something from wood that you can actually use elsewhere but the idea of carving Viking chess piece doesn’t really appeal to you? Then try whittling something a little more run of mill that everyone might use! We love the idea of making a wooden spoon that we will guide you step by step for carving your very own wooden spoon.
Carving a wooden spoon is a great activity because the process is directed, but still has a place for creativity. It’s easy enough for anyone to learn and delivers success at virtually any level of completion because there’s always a use for an odd spoon and even when they don’t go exactly to plan, they still come out as a beautiful handmade work of functional art.
Step 1: Tools and Materials
I’m going to share my process for spoon carving in this Instructable. It’s by no means the official way to do it, or even, a carving purists way to do it since it involves the use of several power tools that all remove wood more quickly than hand carving. Please just use this Instructable as an inspirational guide to start carving wooden spoons and utensils, and not as the end all word on the very complex and highly skilled process of wood carving, of which, I am by no means an expert or qualified teacher.
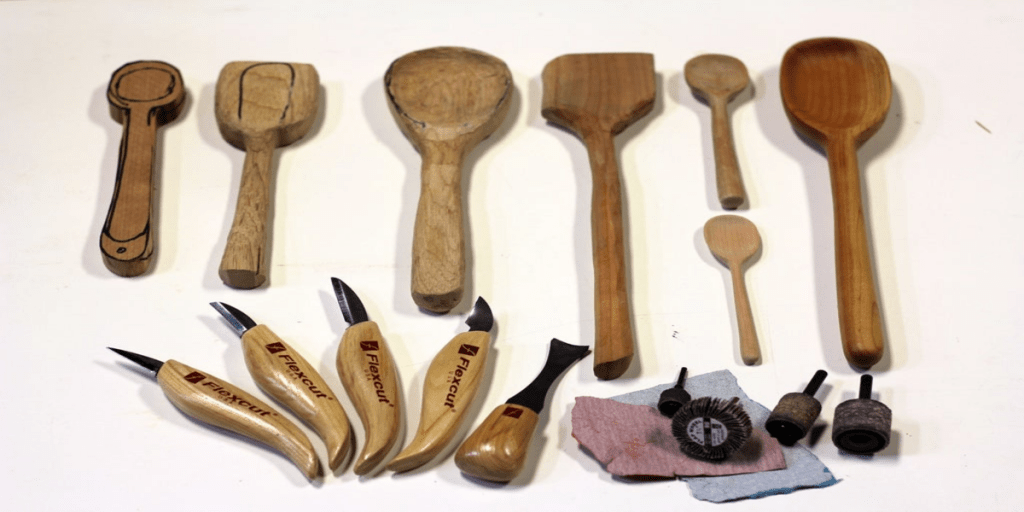
Tools and Materials:
- sharp carving knives including at least a medium straight knife and a rounded or sweep gouge. (I bought my knives from Flexcut)
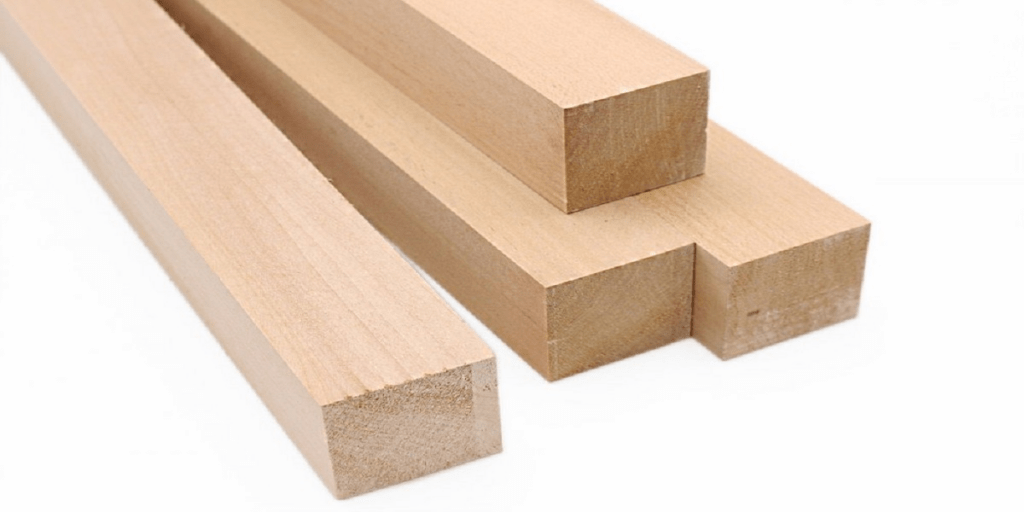
- chunk of soft wood a little larger than the size of spoon you’d like to carve (more on wood choices in the following step)
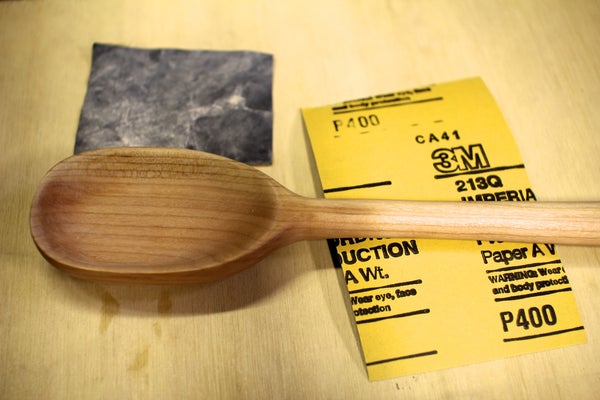
- 80, 120, 220 & 400 grit sandpaper
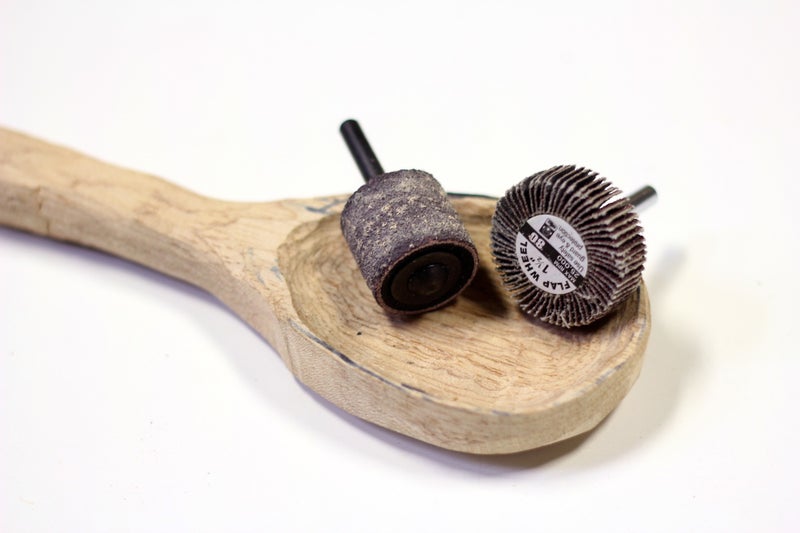
- small diameter (1″-2″) sanding drum or flap wheel
- pen or marker
- food safe wood finish (like a butcher block oil or beeswax finish) or mineral oil
Optional Power Tools:
- belt sander
- dremmel tool
- scroll saw
- table saw
(The entire process can be completed by hand, I simply used power tools to create the blank in order to speed up the process and get to the most fun part of carving – the detail shipping faster.)
Step 2: The Wood
The most important thing to first consider when carving a spoon is the type of wood that you’re going to use. While it’s possible to carve virtually any type of wood given the right tools and techniques, some are easier than others to learn. For completely this purpose, we have a separate blog on “The Best Wood to Carve Spoon.” I hope this will help u in every possible way.
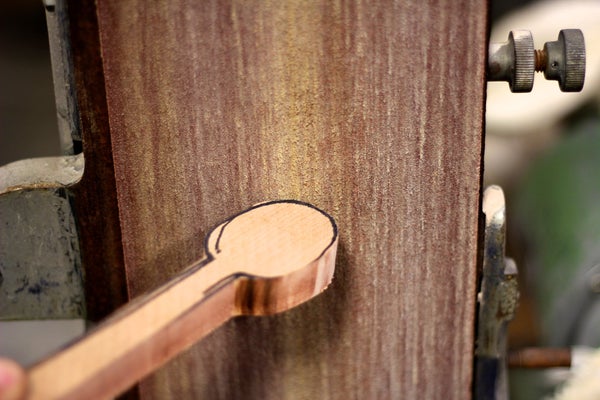
Step 3: Draw a Spoon
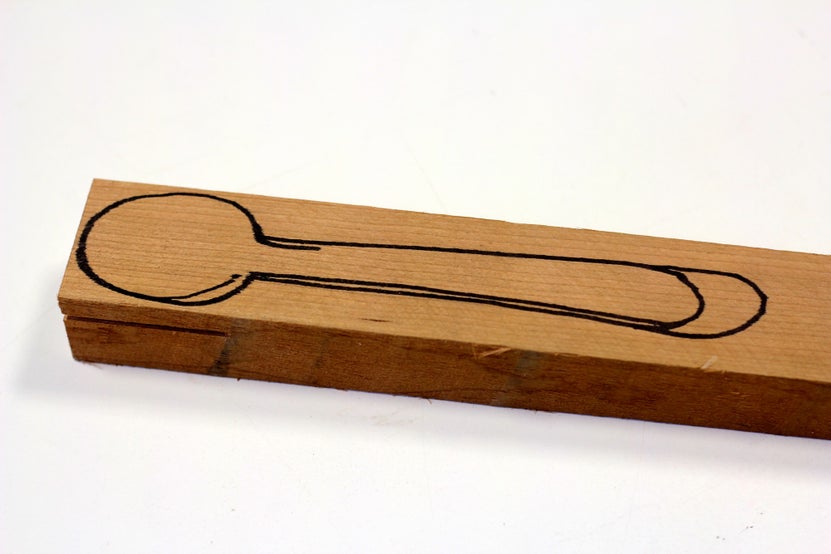
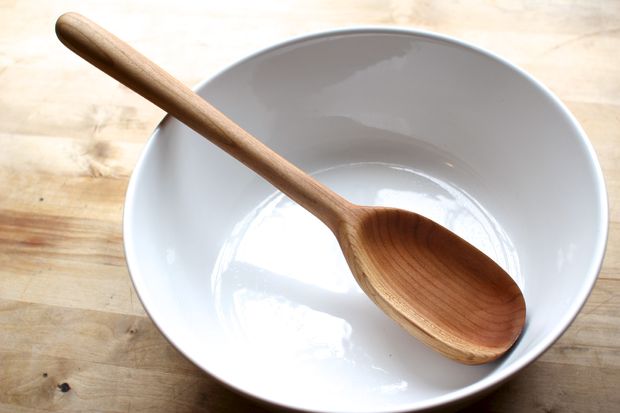
Once you’ve selected your block of wood (I’m using Cherry in the example below) draw a very rough outline of the spoon that you’d like to carve. It need not be detailed, as this outline will only be used to create the spoon blank. Drawing a profile of the spoon you’d like to carve from the side view on the block of wood is also useful, but not necessary.
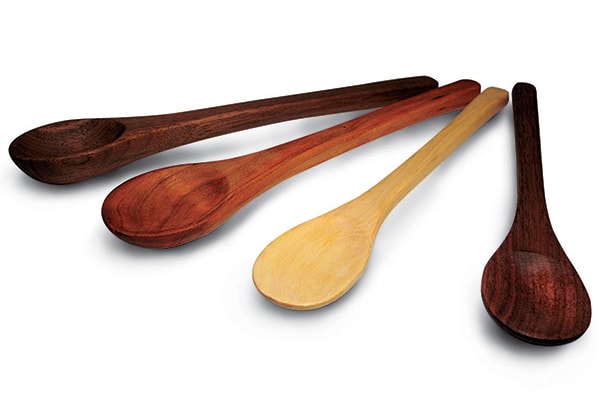
There are literally endless different designs for spoons. Check out some galleries and get inspired. Things can get pretty crazy in the wooden spoon world!
Hand Crafted Wooden Spoons
Spoonlady
James Loyd Hand Carved Wooden Spoons
Kitchen Carvers
Some things I have begun to consider in designing my spoons are:
- spoon size
- type of spoon head
- should it fit in my mouth?
- depth of spoon depression
- thickness and heft
- intended purpose – salad, soup, serving, nibbling, scooping etc.
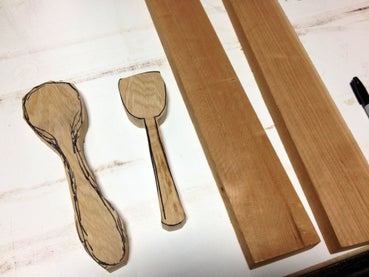
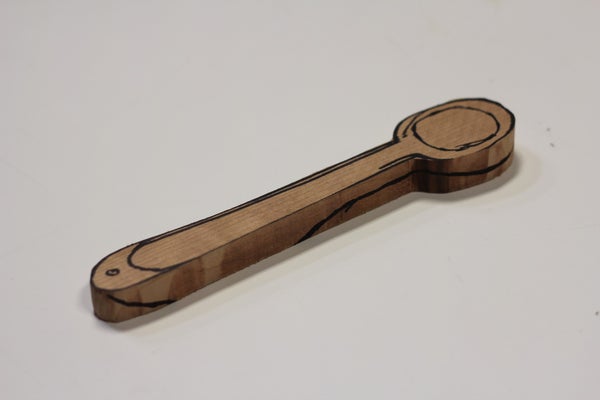
Step 4: Cut Blank
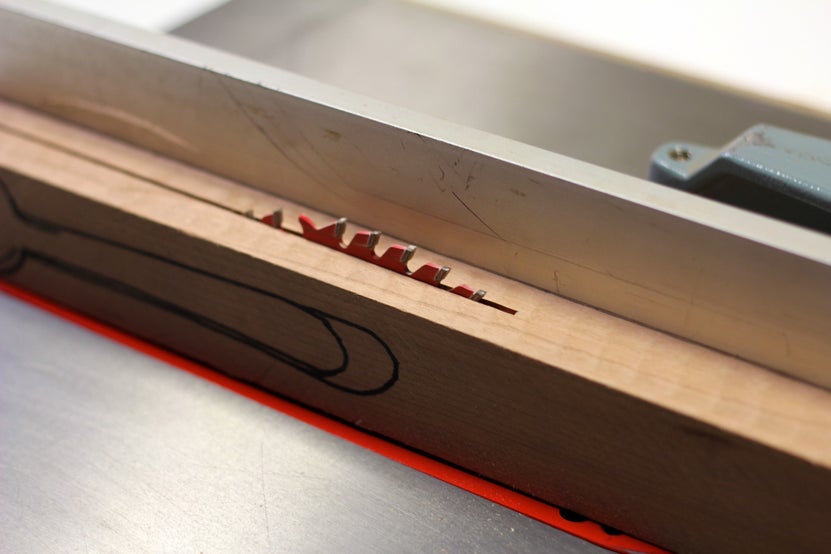
If the spoon you want to carve is smaller than the piece of wood you’ve selected, use the table saw to cut the chunk into a thinner piece so you have to remove less material by hand when carving.
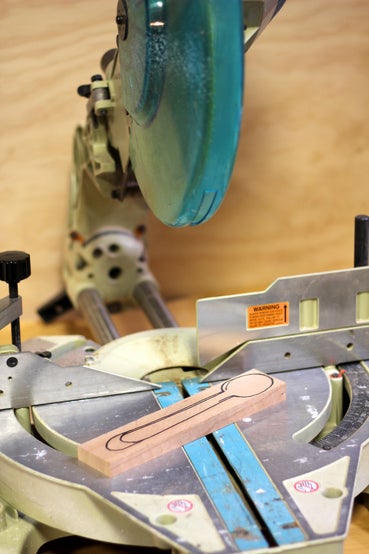
Then, use the miter saw to cut the chunk of wood to length at the ends of your spoon outline.
This is called creating a blank.
Something that’s fun to do is to create many blanks at once and then pass them out to your friends so you can all carve together. Bring some knives and it’s a carving party!
Step 5: Detail Cutting
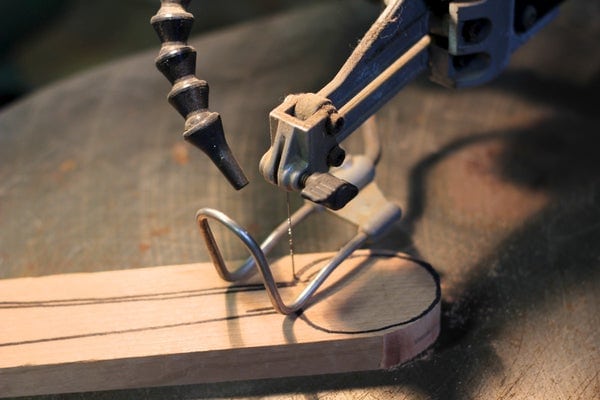
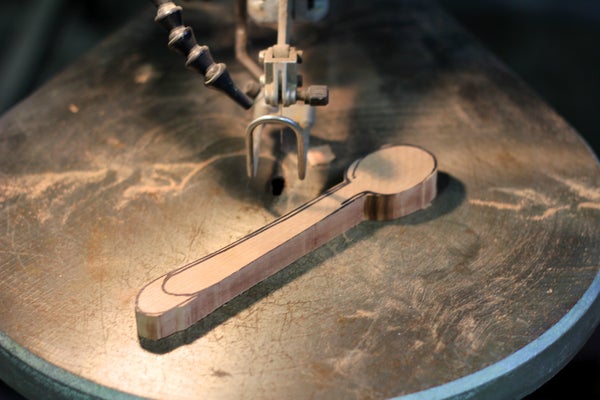
Next, use a scroll saw to cut along your outline. I tried to cut as close to my spoon sketch as possible since that’s less material to remove later. That being said, if you want to have more material to be creative with as you carve, give yourself a little more room when you cut.
You can’t go wrong by making your blank a bit larger and thicker then the intended finished spoon, you can always remove more material later.
If you want to spend more time carving – simply skip this step and remove more material by hand using the carving tools.
Step 6: Rough Sanding
This step is completely optional, but since it was sitting right next to me, I used the belt sander to quickly round over the edges on the spoon and sand down to my spoon outline. Again, anything done with a power tool just saves you the work of having to do it by hand in the forthcoming carving step.
Step 7: Begin Carving
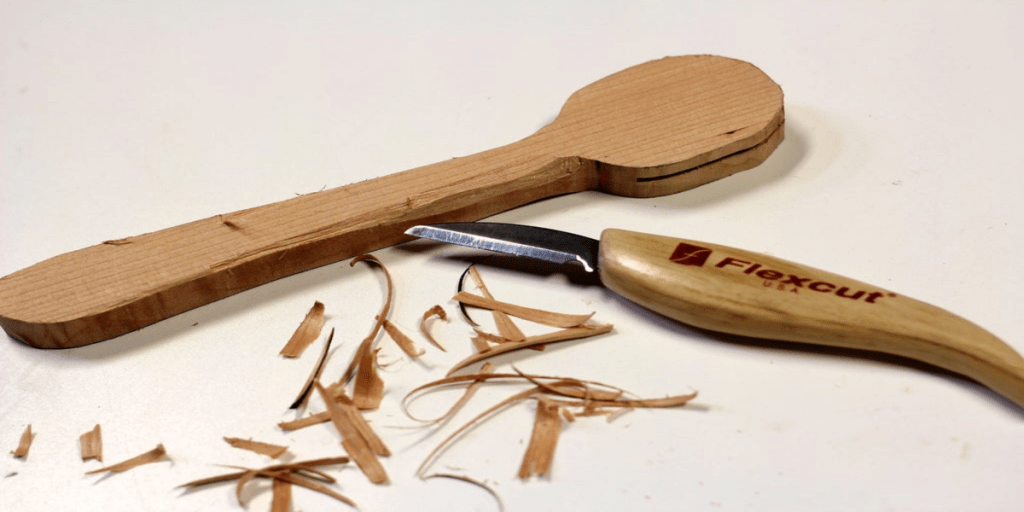
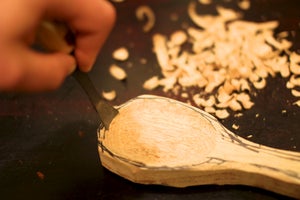
Finally, let’s make some wood shavings!
Now at the very beginning it’s useful just to get a feel for the knife and how it removes material from your spoon blank. Carving along the shaft or handle of the spoon is the easiest place to practice. Start by taking small strokes, removing small amounts of material, and carving away from yourself. While there are situations where you can safely carve towards yourself, at the beginning it’s easier to just carve away.
Think about removing small chunks of material strategically from the tops of curves. Carving down, into notches is more difficult and so I usually like to orient the wood to my knife so that I’m carving over the crest of a curve or along a straight line.
Diving the knife down usually results in a larger-than-intended piece of material cleaving off. Better to stay in control of the cut and carve along the top of the material.
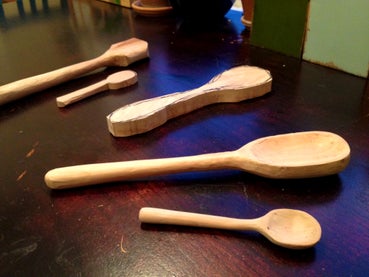
Turning a square block-like blank into a smooth spoon takes time – as in, several hours. So, don’t expect the spoon to take form instantly, instead, just stay with it and work slowly towards the goal.
Step 8: Add More Detail
As the spoon begins to take shape and you begin to round over some of the straight lines in the blank, it’s time to start adding in more detail and making some basic decisions regarding:
- handle thickness
- how the handle tapers and fits your hand
- how long the handle should be
- how wide the spoon should be
- does the spoon have a curved or flat leading edge
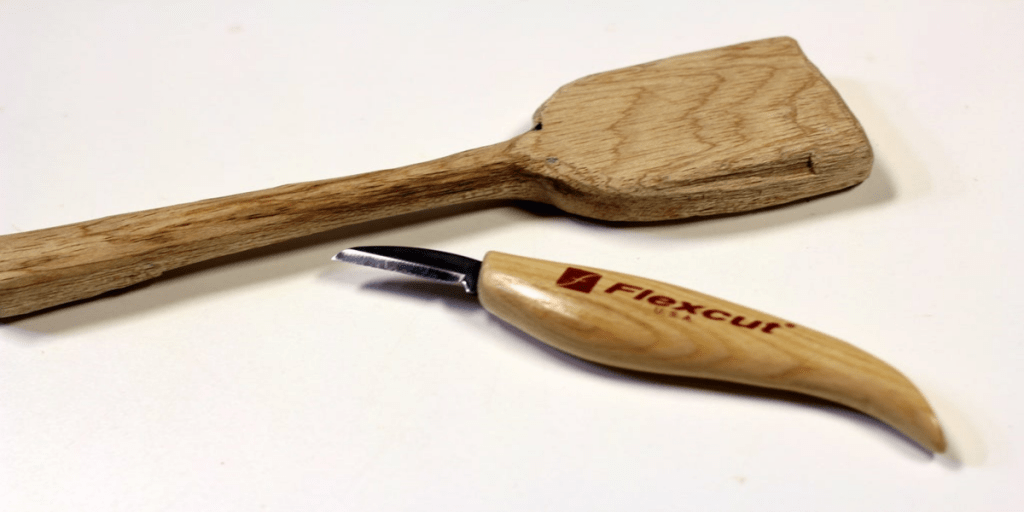
- spoon head thickness
The spoon pictured below has a blunt straight head, more like a spatula that’s good for scraping the bottoms of sauce pans and removing brown tasty bits…of course, this would not make a very good soup spoon.
Step 9: Back of Spoon Head
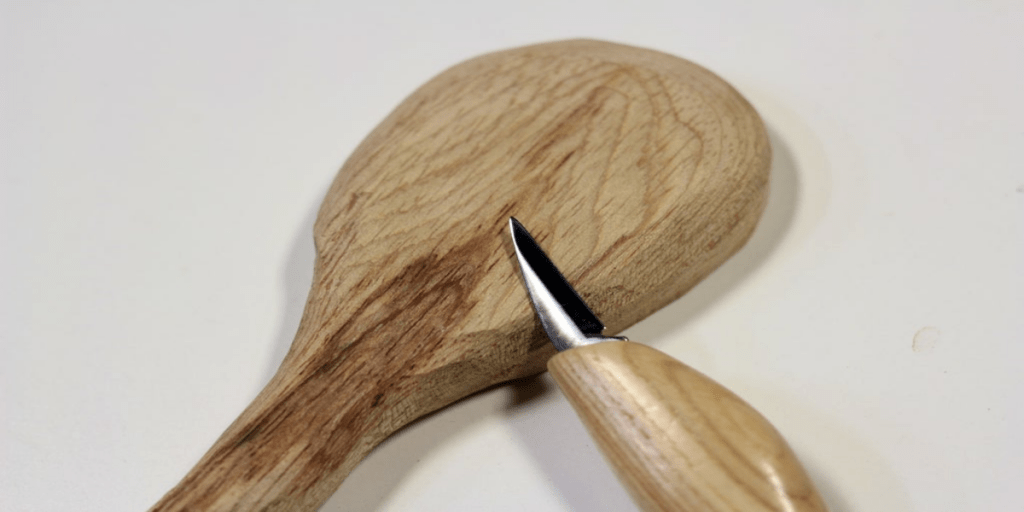
Once you’ve roughed out the handle of the spoon it’s time to start working on the head. I found it easier to start with the convex back of the spoon rather than the dished out concave side.
Begin removing material along the edges of the blank and round out the spoon head to make a smooth transition from the back of the spoon to the rim/wall.
Keep rounding out the back of the spoon and creating a smooth continuous slope.
Step 10: Front of Spoon Head
step 1 step 2 step 3
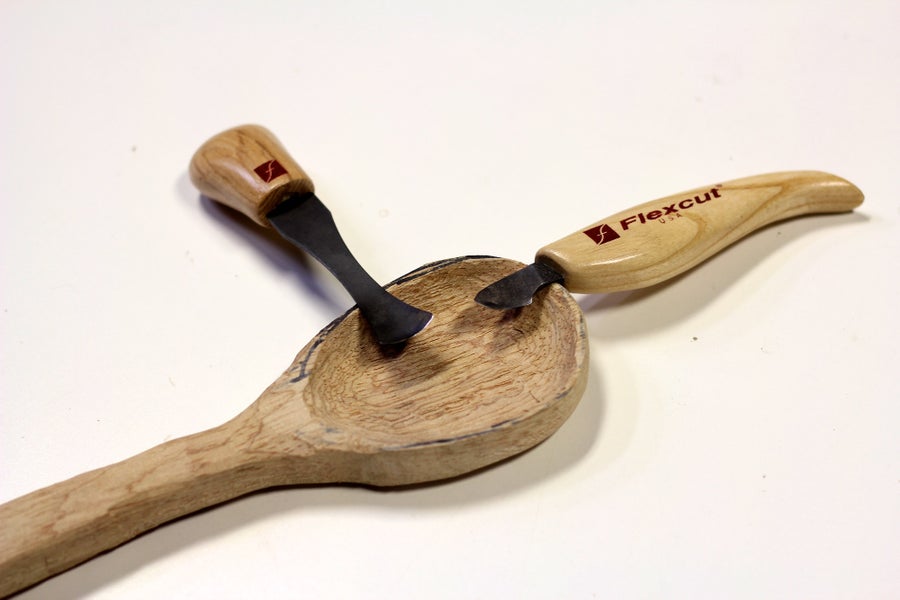
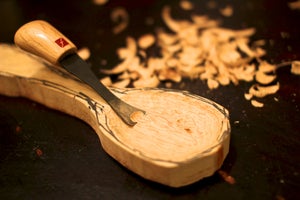
On to the concave side of the spoon – use a rounded sweep gouge or hook knife to start removing material from the face of the spoon.
Remove small bits of material until you begin to form a small divit. Keep removing material digging out wood closer and closer to the outer wall of your spoon.
I alternated between gouging from the center of the spoon towards the wall and working the tool down the wall of the spoon towards the center. Different strokes for different folks…and tired hands.
The hook knife was useful for shallow divots, but not very good at digging deep. That’s where the sweep gouge comes in handy.
Step 11: Sand Away Carving Marks
After extensive hand carving it was time to smooth out the carving marks with some sanding.
I used a small drum hand sanding attachment for a rotary tool, a 1″ diameter 80 grit flap wheel and the small Dremel sanding heads to sand the inside concave dish of the spoon.
Hand sanding and a belt sander do just fine for the easier to reach back and handle of the spoon.
Step 13: Protective Finish
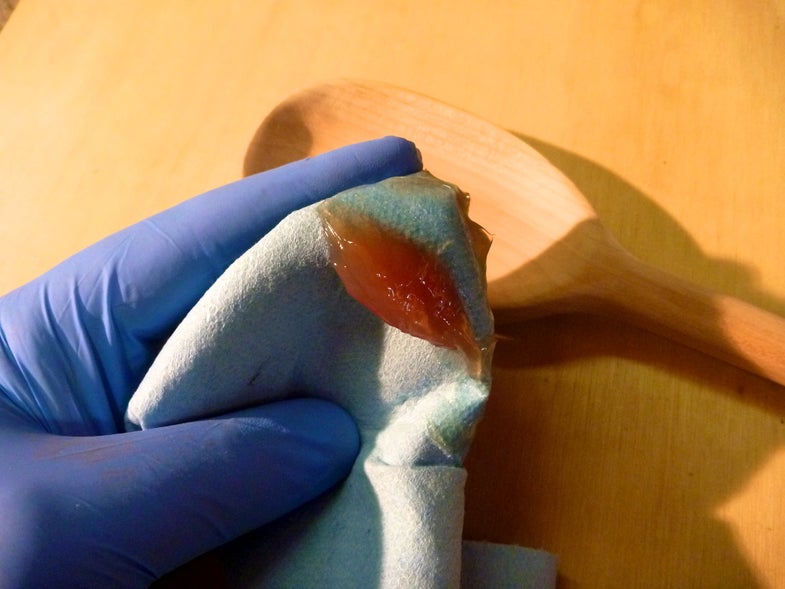
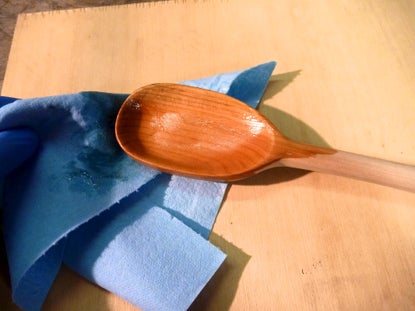
As a final step, apply a food-safe protective finish to the smoothly sanded spoon.
Mineral oil is also an completely acceptable finish, as well as any other “butcher block oil” or beeswax based finish that you may like to use.
Once the finish is dry you’ve got a spoon that’s ready to use and enjoy!
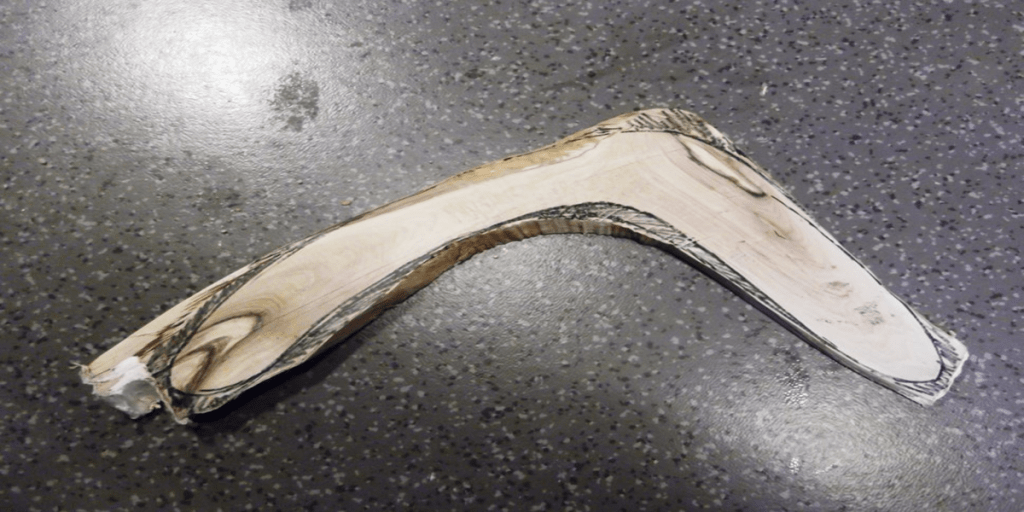
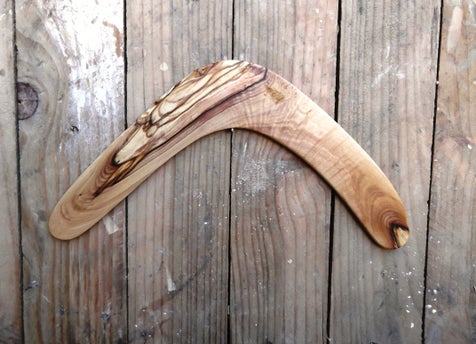
3. Smoothly carved boomerang
Perhaps you’ve been scrolling through this list trying to find a whittling project that’s a little more unique and not necessarily something other people would first think to start making? Well, we’re pretty sure this smoothed out boomerang would fall into that category!

For many years I’ve been designing, making and throwing boomerangs. At the beginning my booms were made of plywood, a cheap and easy to handle material – all you need is some plywood, a jigsaw and some sanding paper. Boys grow up, and men always want more. So I wanted to make my projects a bit more exciting and discovered a whole new world: natural boomerangs, or better ‘natural elbow’ boomerangs!
Natural elbow boomerangs are made of elbows you can find on almost every tree (you can also use natural ‘Y’s’). Actually living in the outback of Southern France, I’m working with the local species: Holm oak (Quercus ilex) and Olive (Olea europaea). In this Instructable I’ll show you how to make a boomerang made of Olive. You’ll see, the making of this kind of boomerangs is really great fun and once you started with it, you’ll never more touch plywood again.
- All you need:
- pocket saw
- grafting wax
- polyurethane glue
- manual saw
- vice
- plane (electric is highly recommended)
- jigsaw
- sander
- sanding paper (from 80 to 600)
- safety gloves, goggles & ear plugs
- natural oil
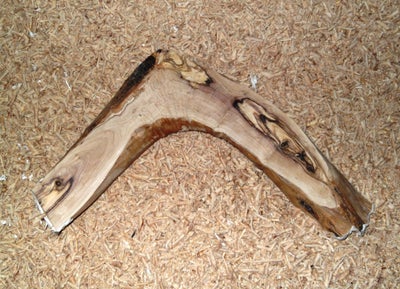
Step 1: Find a Natural Elbow

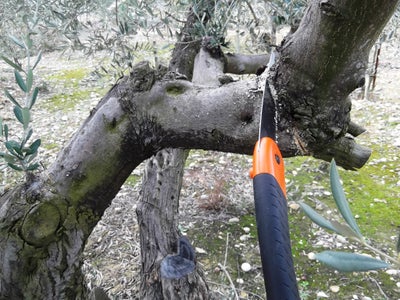
First approach: ‘I’ll go out for a ride and I’ll see what I’ll find’. Not bad at all, go sniffing in the bushes and I’m sure you’ll find something.
Second approach: choose your wood species, find the right trees and check them for elbows. If you’re looking for Sequoia-stuff you’ll need a telescope and some climbing equipment. The advantage of Olive is that it’s a small species with lots of potential booms easy reachable from the ground.
If you’ve got the chance to find a dead tree you can skip the next step.
Look for branches with a diameter of 10 cm (3 inches) more or less. The more it’s curved, the better. Cut the branch with your pocket saw, cut the elbow from the branch and hide the waste-wood – or take it all with you. Don’t forget to put some grafting wax on the wound you’ve left.
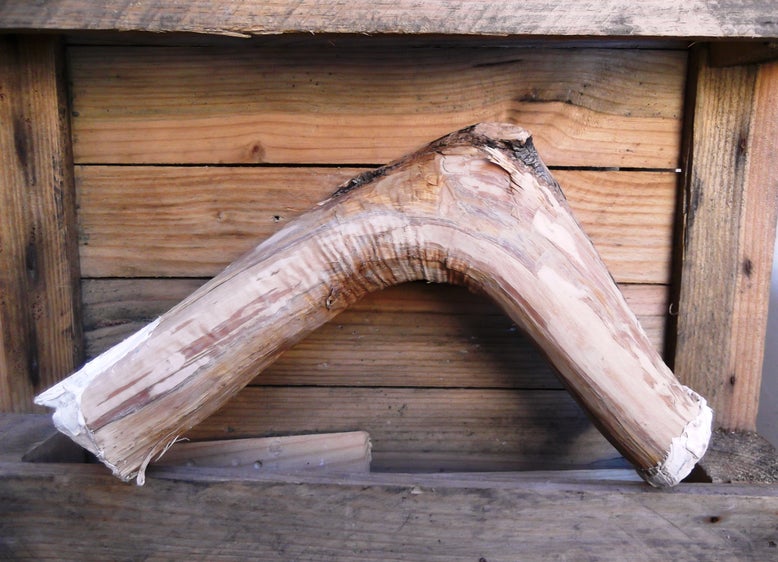
Now let it dry, to make it faster peel of the bark with the knife and seal both ends of the elbow with polyurethane-glue. You can also use candle wax. This prevents the wood from drying too fast and cracking. Give it some time – one year is perfect – and store it in a well ventilated place. Do not put it in direct sunlight or on a radiator. The slower it dries, the better.
Step 2: Preparing the Elbow
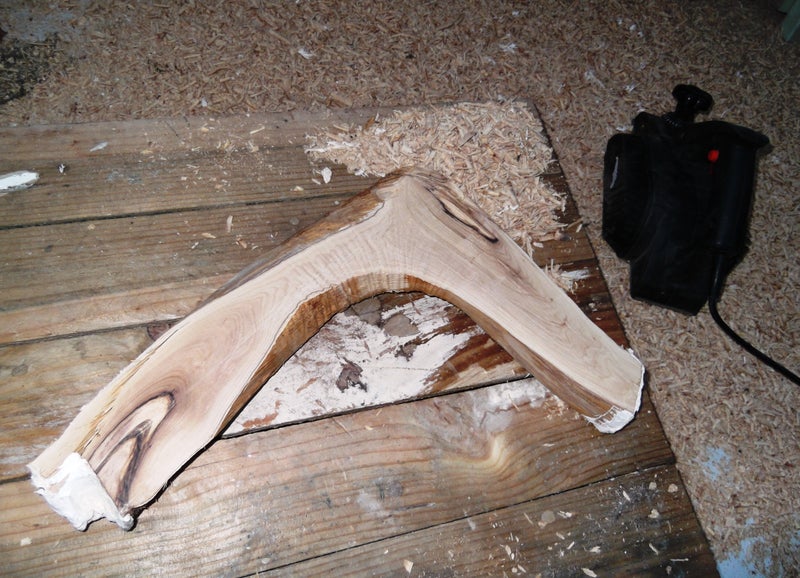
Our elbow is finally dry and we’re ready to go. It doesn’t look very well yet, but inside this piece of wood three boomerangs are hidden. Before going to slice the elbow into pieces we have to prepare it, this means that we’re going to plane it to have a flat surface on both sides with a thickness that’s almost the same everywhere. Use an electric plane and don’t forget safety gloves, goggles & ear-plugs.
Step 3: Slicing
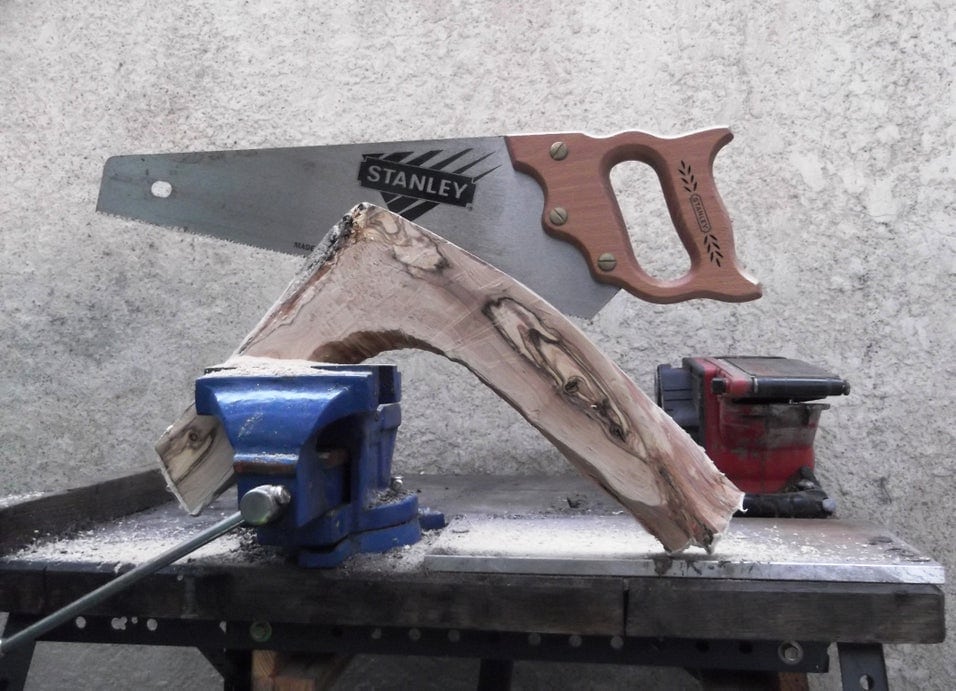
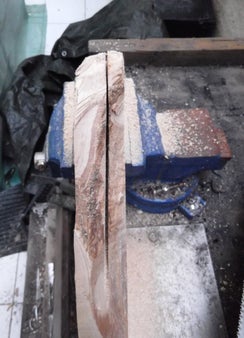
The bigger the diameter of the elbow, the more slices you can make of it. I usually try to saw boards of 1 cm thick (1/3 inch). Secure the elbow in a vice and slice it with a manual saw. I don’t recommend electric saws. Circular saws are too difficult to handle, too dangerous as well and I don’t have great souvenirs from jigsaws. A good old well-cutting saw will do the job very fine. In this phase you’ll be submerged in the wood smell. Every species has its own flavor, but I’m sure there’s nothing better than the smell of fresh cut Olive-wood: a mixture of grapes and cherries!
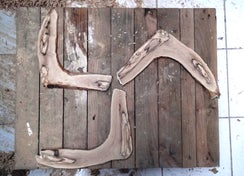
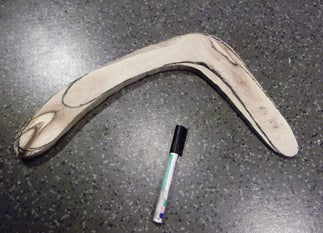
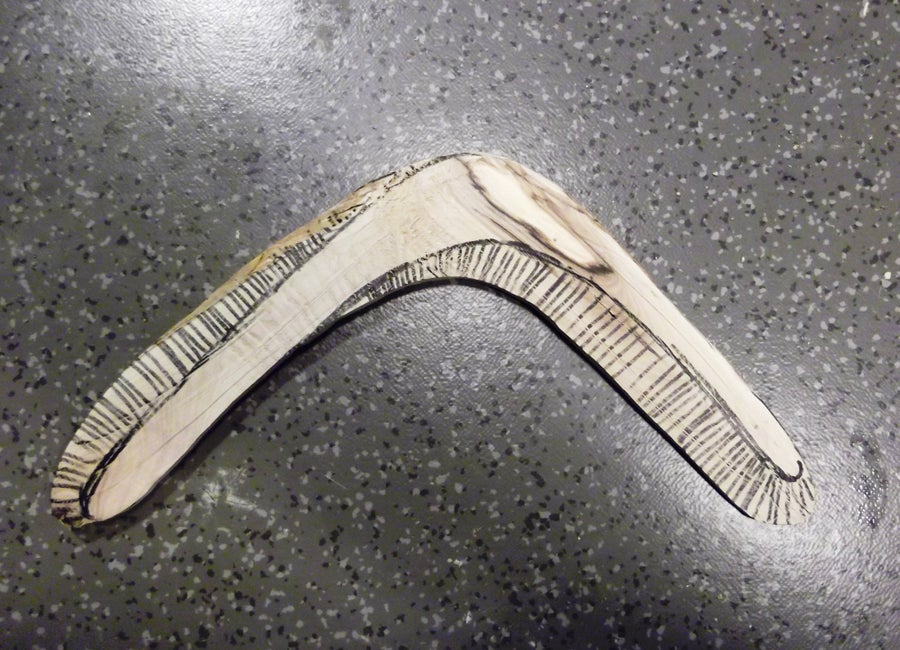
Step 4: Designing
Now you’ve got at least one slice from your elbow, time for the real work. You don’t have to think a lot, the tree has done this job for you. Look accurately at the wood structure and benefit from the possibilities it gives you. Let your imagination go, draw some basic lines and get back to work. Never forget: the tree shaped your boomerang, all you do is fine-tuning its job.
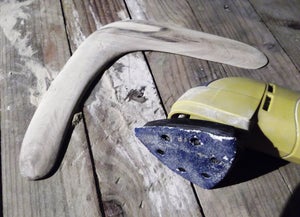
Step 5: Shaping
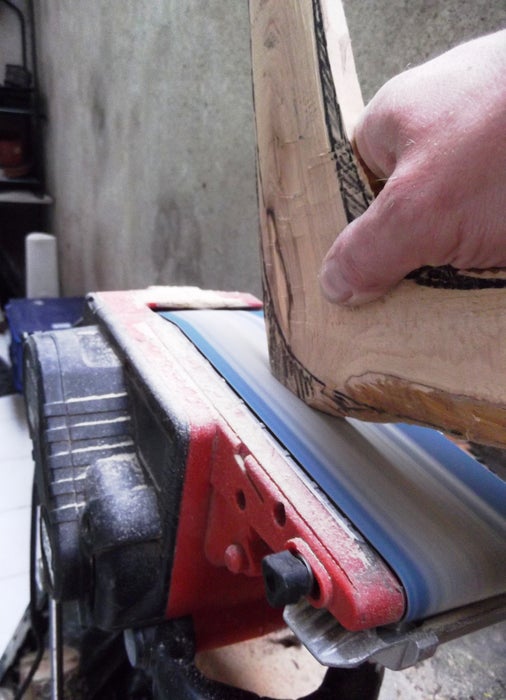
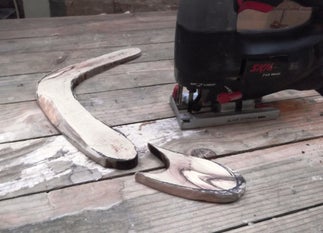
In this phase you’re using sander, jigsaw and plane. To remove small sections you can use the sander (I fixed mine in a vice). For the rest you can use the jigsaw. During this step you can always adjust the shape of your boom (first I wanted to make an asymmetrical boomerang but I changed my mind and went for a pure traditional shape).
Optional: When this shaping is done you can pay attention to the thickness (I always make my boomerangs thicker in the middle). Use a plane for this.
Step 6: Profiling – Basic Boomerang Aerodynamics
Back to the table. A boomerang is a set of wings put together in a certain way. Wings are profiled, and flattened towards their ends. To understand why and how boomerangs behave, you’ve got to know some basic principles.
Boomerangs do not just go away and come back. The main reason they do so is that they turn very fast around their axe after being thrown. While throwing a boomerang the right way, you’re giving it the necessary rotation. This movement is counterclockwise (for a right-handed boomerang), the leading edges (steep wing-sides) cutting the air, just like airplanes, birds etc. The rotation gives them uplift, and the setting of the wings causes a spin. This spin forces the missile to flow not just right away. Translated: your rocket is coming back home. Get these basics in mind while setting the profile or download the picture. This drawing-thing isn’t exact science, sanding and feeling will do the rest.
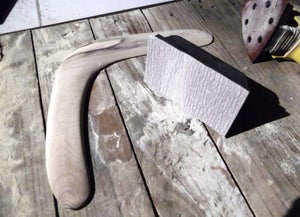
Shaping the profiles is sanding, sanding and especially sanding: heavy (electric) sanding with coarse grain at the beginning and manual sanding with finer grains to finish. This phase is pure instinctive, so try to make the best wing-profiles you can get. And take your time.
Step 7: Oiling
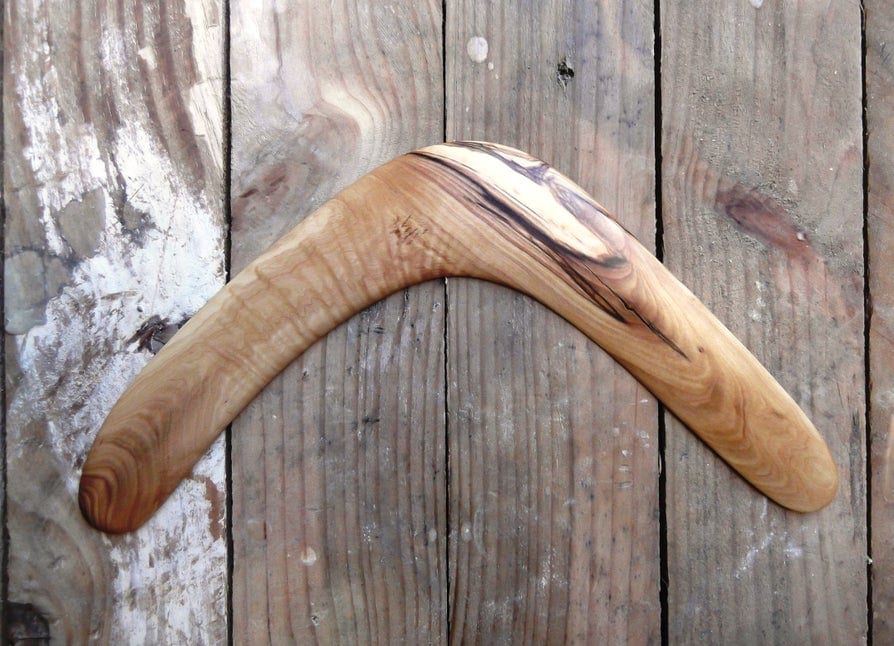
Your boomerang is almost finished now. All you have to do yet is giving it some protection. Some prefer varnish, others epoxy… I prefer natural oil. Nothing is more exciting than putting the oil on your hands, warming it up and giving the fresh made boomerang its first massage. Rub away the oil excess with a piece of cloth and give it a second treatment the day after.
Your boomerang is finished, ready to give it its first flight?
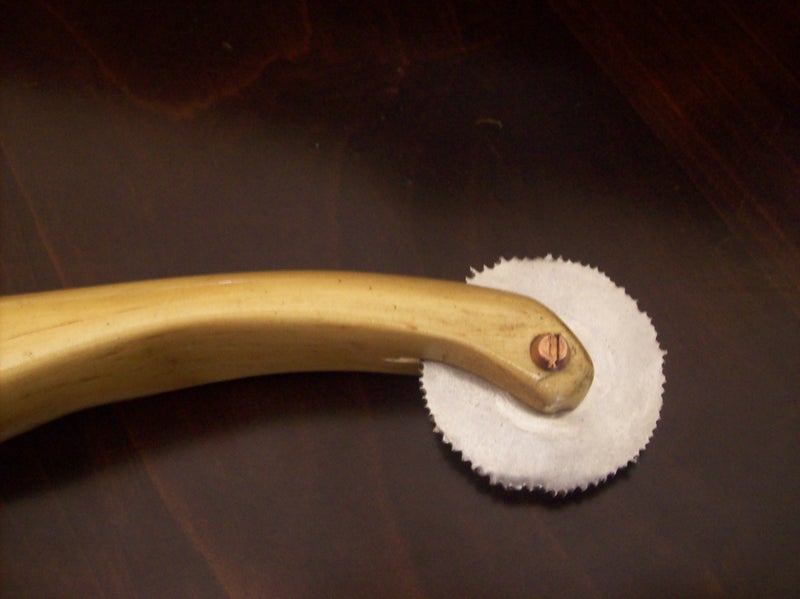
4. Hand Carved Pizza Wheel
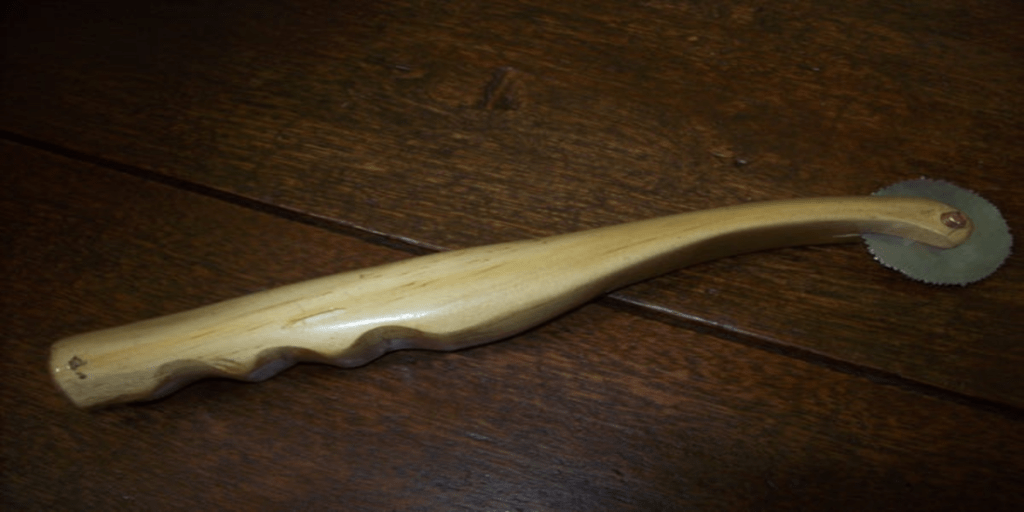
Don’t you hate when you cook Pizza in your home and you can´t cut the Pizza in equal slices …well that happened to me and I decided to make my personal Pizza accessories.
Step 1: Stuff Materials

- 1 Stainless Spoon.
- Piece of Wood.
- 1” Screw.
- Drill.
- Mask Tape.
- Math Compasses.
- Hammer.
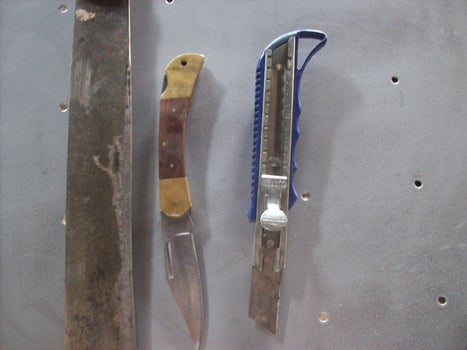
- Machete.
- Buck Knife.
- Cutter.
- Sand Paper.
- Beeswax.
- Varnish.
Step 2: Cutter Wheel
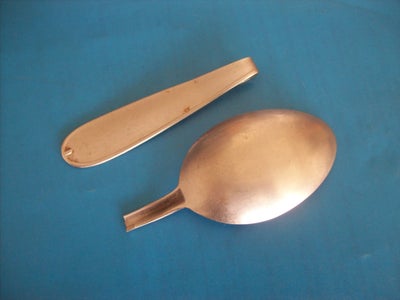
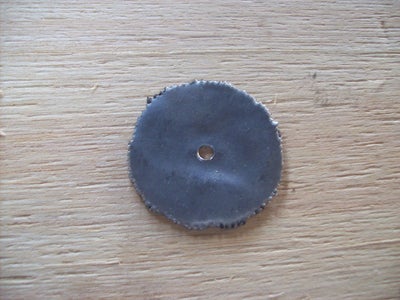
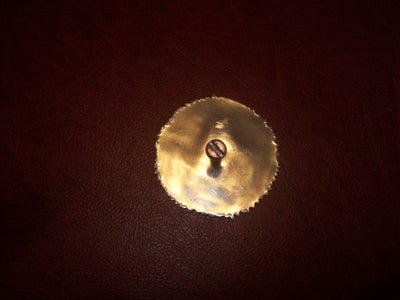
- Smash the Spoon over an Anvil, but first cover the Spoon with Leather or Rubber , if don´t Hammer will harm the Spoon Surface.
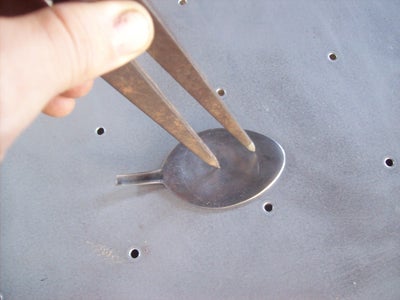
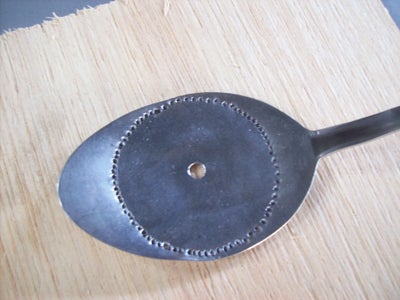
- With the help of a math compasses find the center of the spoon trace a circle and drill a 5/32 hole.
- punch the whole circle with the steel puncher.
- with the pliers you had to remove the remaining pieces of the Spoon.
File the wheel in the vice with a triangle file.
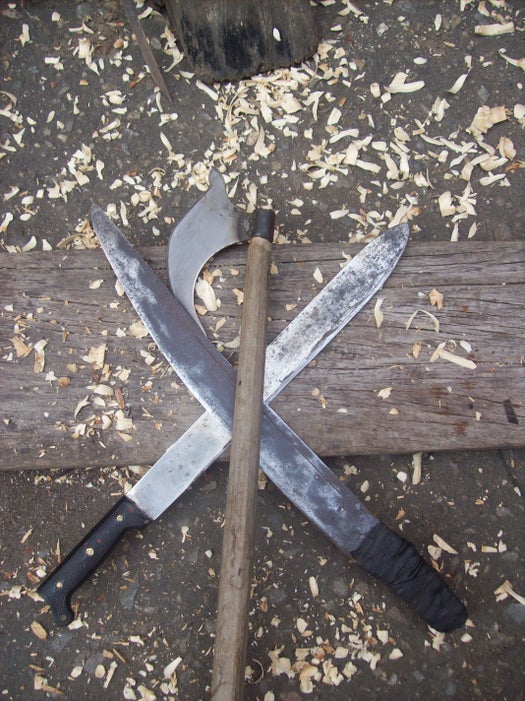
Step 3: The Handle
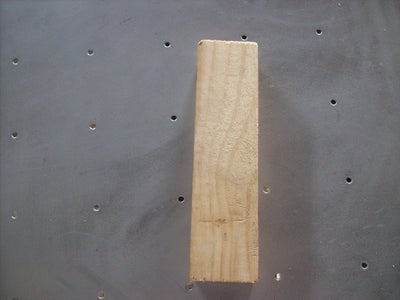
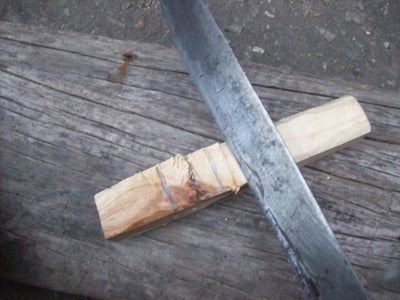
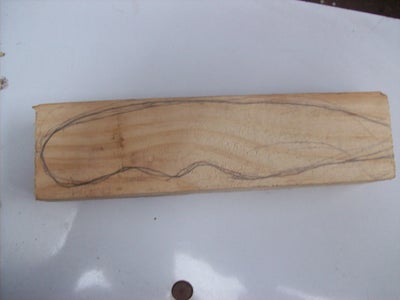
I Found a nice piece of wood, draw the design and start to carve with Machete .I gave the shape according the wood texture.
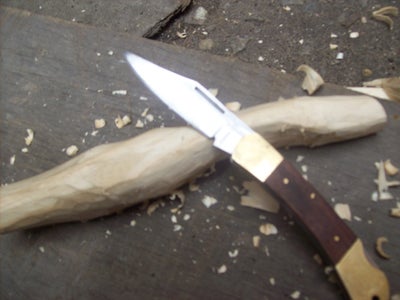
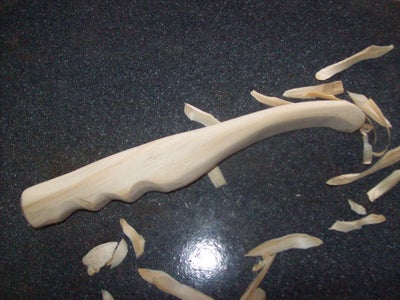
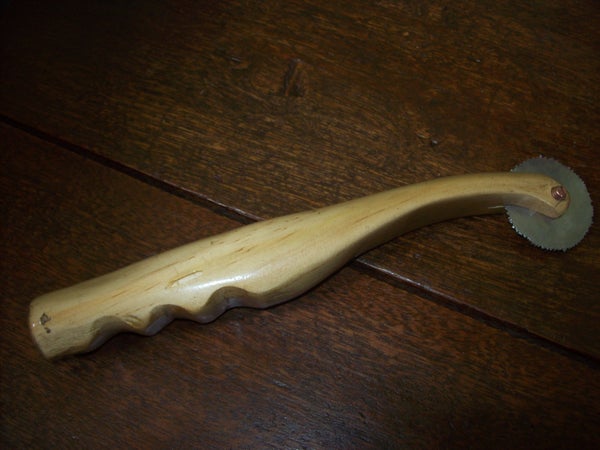
To smooth the edges I took “Mikaela” my beloved trusty buck knife and make the ergonomically shaping , Sand with different types of sandpaper, If you want you can engrave whatever you want or carve your name initials; beeswax or varnish it ;Fix the wheel and that´s all. Ready to cut pizza.
Step 4: Ready For Some Action
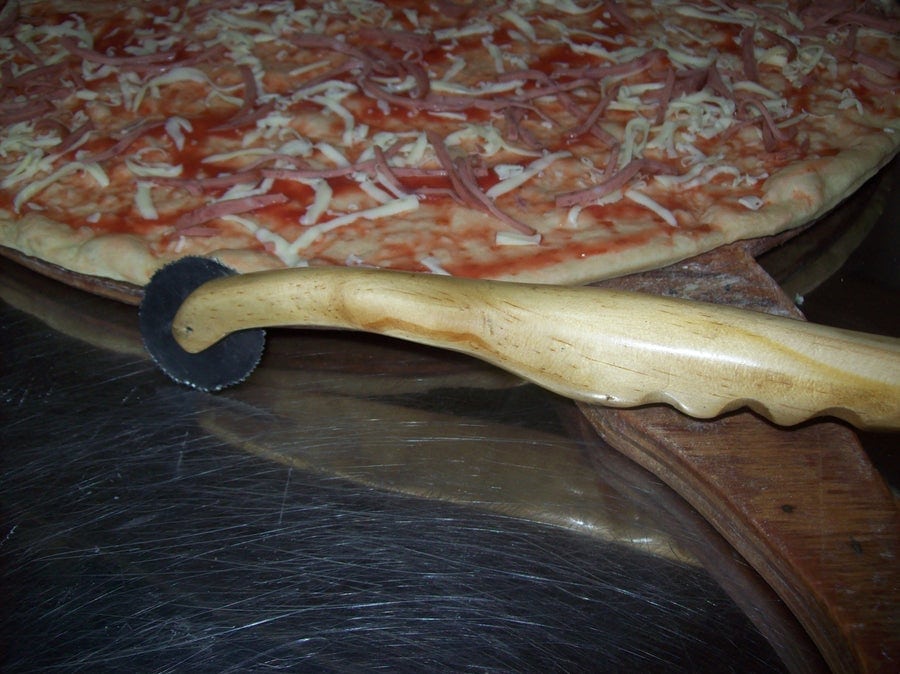
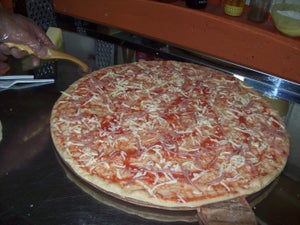
Hope you like it!