
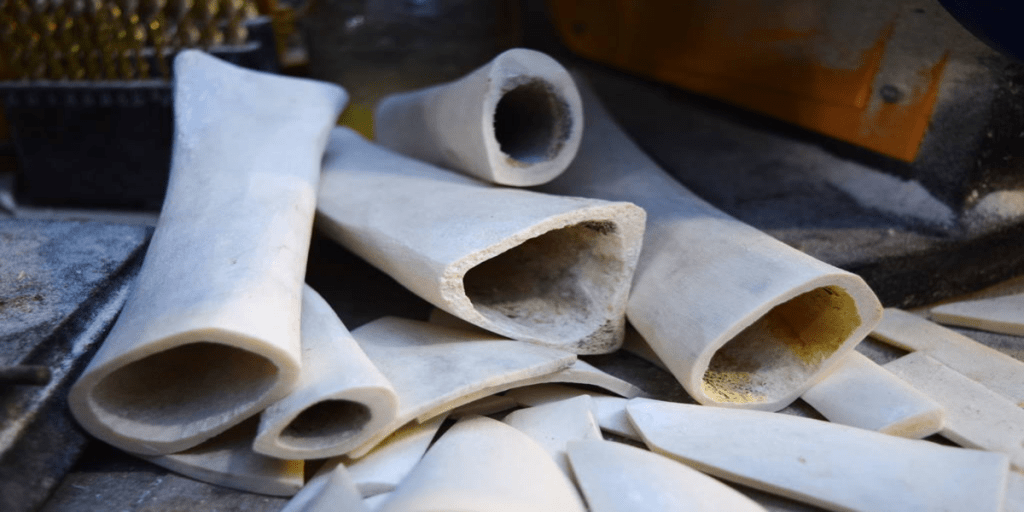
Despite your aim (current working in a shed, or period working at a demo), the absolute minimum for a bone specialist is viewed as generally the equivalent; a saw, a drill, two or three documents/scratches (one coarse and one finer), a decent blade, and a determination of etches. In the event that you are making period ancient rarities from the Iron Age onwards, at that point, a ring-&-dot tool (or 3) would likewise be helpful as it is one of the most well-known types of decoration.
Contents
Safety First!
Always remember that if you are going to be using power tools that generate dust, make sure you take precautions!
bone Dust and it’s Harmful effects:
In any case, one specific area is very significant, and not all that basically managed – dust. When working bone in a conventional way, the residue is never actually an issue as most molding utilizes cutting edges, and even a ton of completing should be possible with a blade. Furthermore, most smoothing of things utilizing pumice, ash, sand, and so on happens at low speed and never truly makes a residue cloud or fine particles. Present-day apparatus however is both a gift and a revile – seat-mounted processors and sanders can accelerate the forming cycle for some things massively, yet they do deliver a possibly extremely destructive measure of little molecule dust.
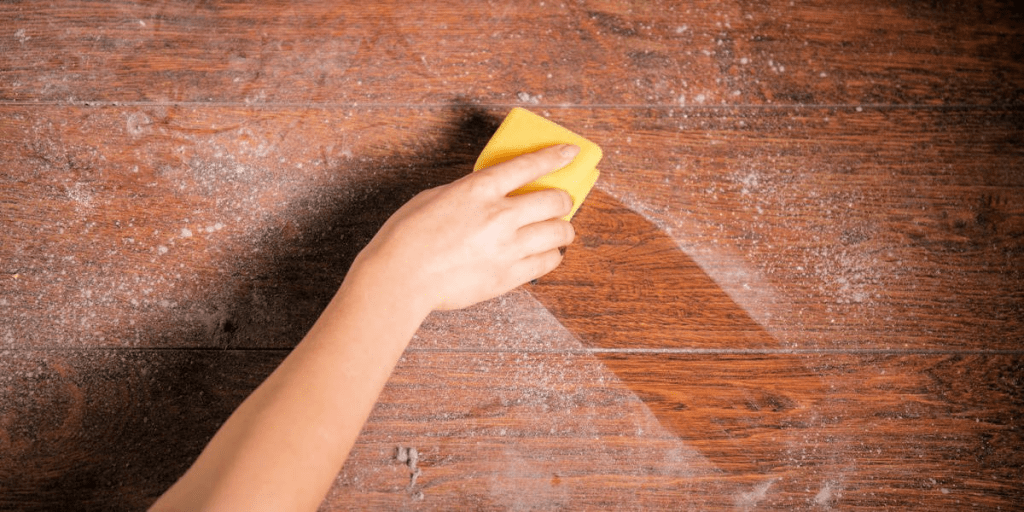
Contingent upon the condition of the bone, the speed and coarseness of the machine being utilized, and so forth bone residue shift in size from around 3-300 microns (µm).
The bigger of these particles (>100µm) are not very irksome as they will in general settle from the air moderately rapidly and are not all that simple to lift again essentially by moving. They are as yet not extraordinary and you would prefer not to be breathing through a haze of it, they are just not as awful as the more modest particles.
The particles that are <100µm are an alternate issue, however. These are what is viewed as “inhalable residue” (can be breathed in through the nose and mouth during typical breathing) and can be hazardous. When the molecule size gets down to <10µm it is known as “thoracic residue” (can go through the bodies different safeguards and enter the lungs), and given that bone, dust doesn’t normally live in your lungs it tends to be securely expected this is certifiably not something worth being thankful for.
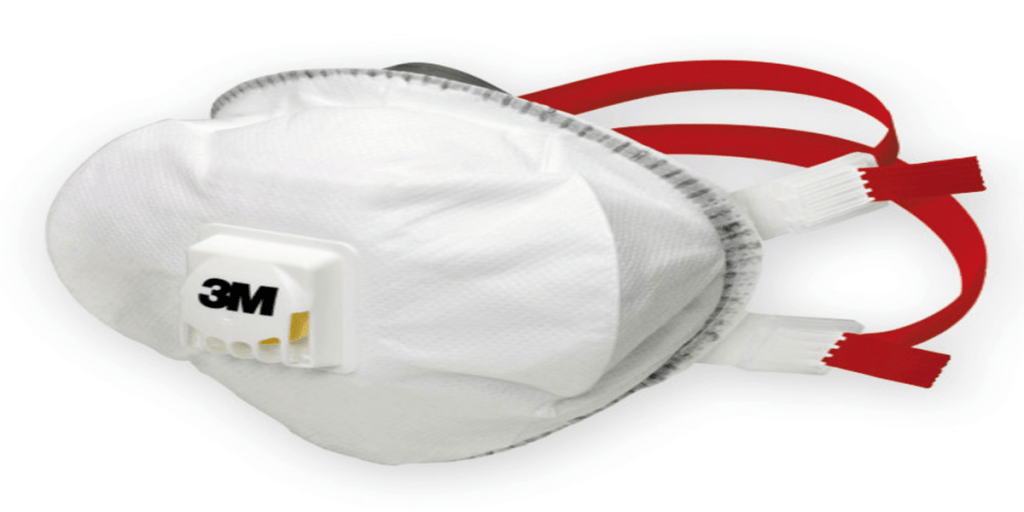
Far and away more terrible than thoracic residue is the “respirable residue” (molecule size of under 5µm) as these particles can even enter into the gas trade territories of the lungs and conceivably cause a wide difficult situation.
Prevention
Past the conspicuous technique for anticipation (don’t use power grinders/sanders), there are a few ways to keep inhaling dust to an absolute minimum.
The simplest is figuring out some decent PPE. There are various kinds of face masks available and even the most fundamental of these is better than nothing. Nonetheless, if you are going to engage in incessant or heavy dust-producing operations, it is smarter to get something more genuine. In taking a stab at a harmony between setting aside cash and, well, not kicking the bucket of bone filled lungs, the most ideal choice for the vast majority would presumably be a FFP3 (European) or N100 (US) appraised cover. A solitary expendable FFP3 veil is about £3-4. In the event that cash is no article, or you will be working day by day with bunches of bone residue, some sort of all encasing channel cover would be greatly improved. Different sorts of channels, for example, charcoal, HEPA, etc are redundant as they center around fume, extraordinary little (<1µm) particles, or microorganisms. Notwithstanding the sort of veil, you use it is consistently essential to make sure to guarantee it accommodates your face effectively – it is nothing but bad having a cover that channels out everything on the off chance that you leave a colossal hole around its side.
Tools For Bone Carving And Their Purpose
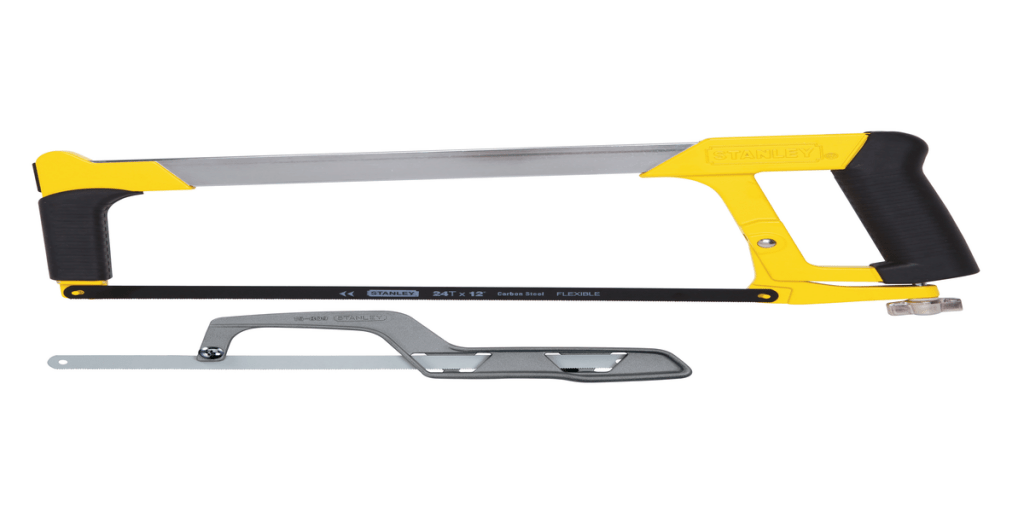
Saw:
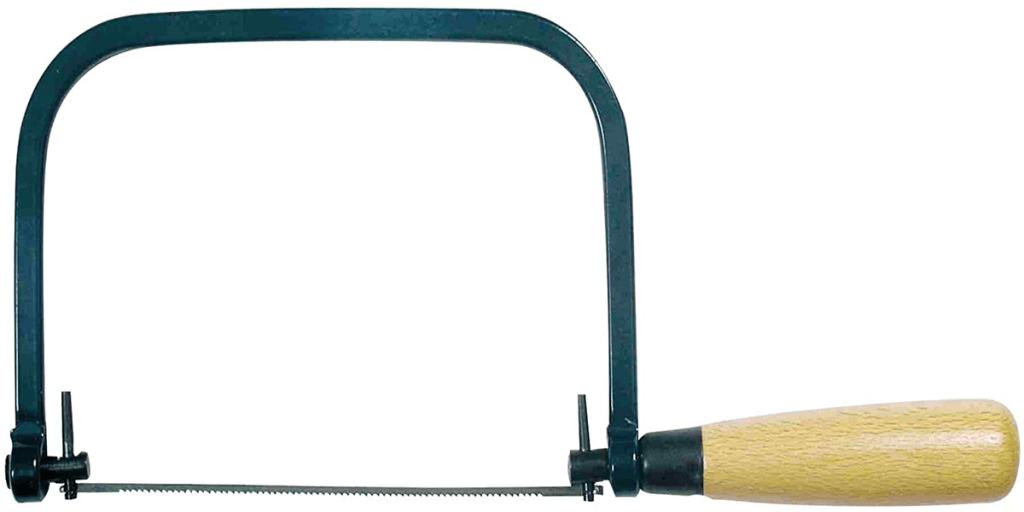
Personally, I have a wide variety of saws that I use for different operations, but I would at least recommend a 12′ hacksaw and a coping saw. The biggest benefit of all of these is that the blades are replaceable and relatively inexpensive. For most roughing out work, the hacksaw will be used and the coping saw can deal with the most sensitive work, such as pendants, and can also be used to cut fine comb teeth.

Coping Saw
Drill:
While drills are obviously useful for creating holes, the fact that they speed up the decoration process when making ring-&-dot decoration is another feature (especially when making period artifacts). A typical variable-speed cordless drill will be enough for most tasks in a modern workshop, and either a reciprocating drill or a bow drill will be useful for a period toolkit, though it takes a bit of practice.
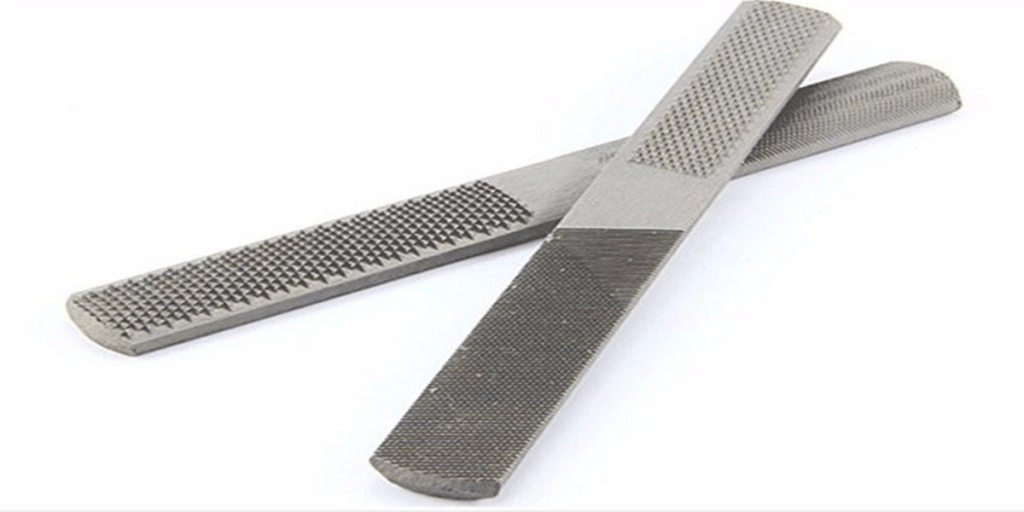
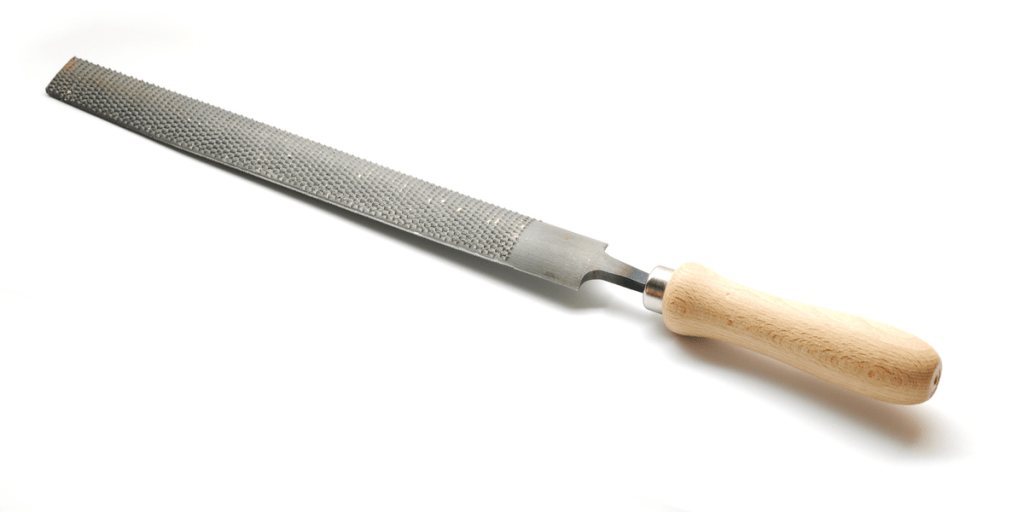
Files and Rasps:
It will usually require some shaping and smoothing until your workpiece has been roughed out. The time that this takes (and the amount of bone you have!) can be drastically decreased by a good rasp, so it is worth having a good one. Personally, I have an old farriers rasp that I use and it is excellent-it can very easily scrape large amounts of bone, antler or horn, and on the back has a finer grade file. Surform rasps are also pretty fine, but as I find they clog very easily, I would say to avoid “ordinary” solid woodworking rasps. A wire is always handy for any rasp to clean out the teeth.
Files
Rasp
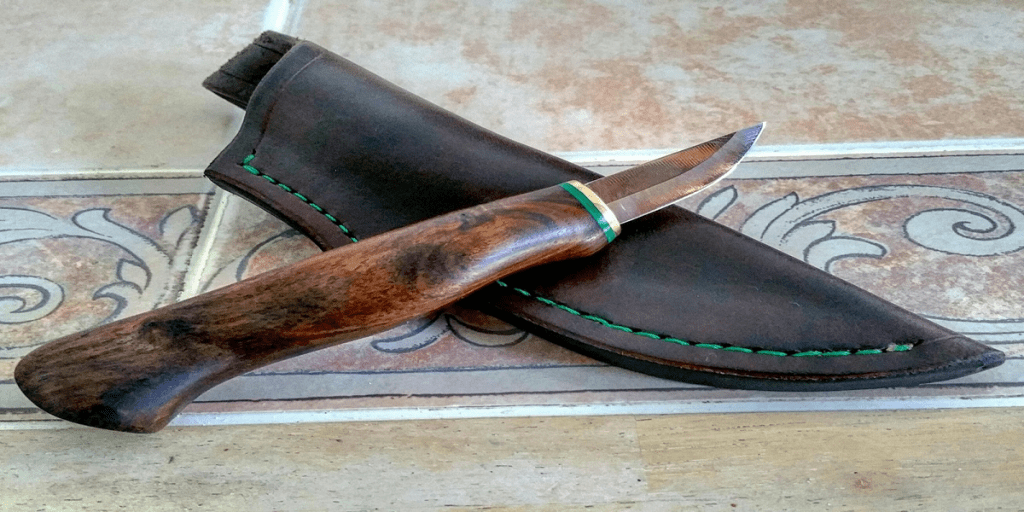
Knife:
A powerful, sharp, bone-working knife is invaluable. Many functions can be performed; creating holes, shaping, carving, smoothing, etc. The Mora 106, which can typically be purchased for £12-15 (or £8-10 for the blade alone), is one of the best I have found. A suitably hafted Mora blade would be just as good for demonstration reasons, depending on how strict the authenticity team is. If you can’t use it, though, any solid blade made of decent quality steel of roughly the same dimensions does the job.
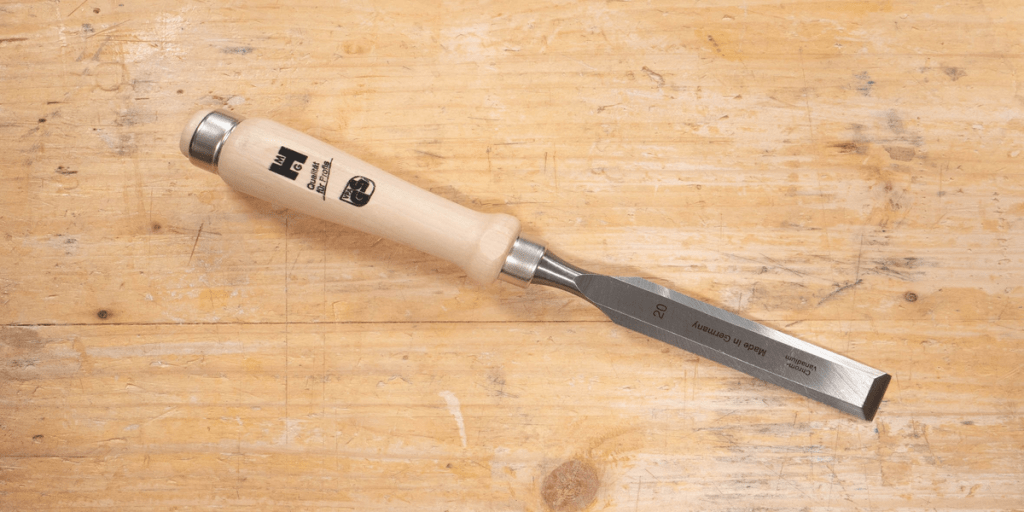
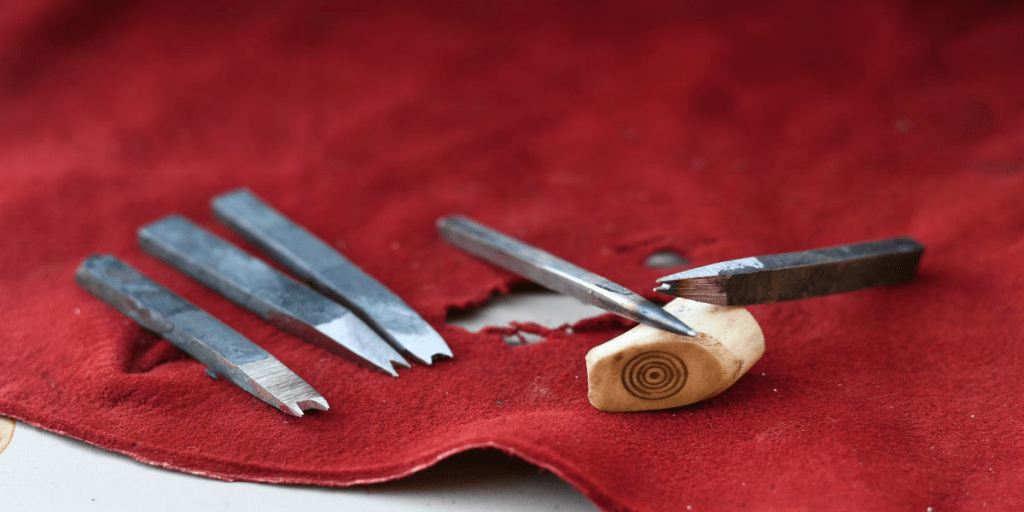
Chisels:
Little handheld chisels are the perfect tools for delicate bone carving. All good examples include chip carvers, micro carvers, block cutters, etc. The hard nature of the material ensures that high-quality tools are necessary for the best results (and the least wear on the tools) and pre-softening of the material is recommended. A simple collection should have smooth and skewed chisels, and gouges of “V” and “U.” These four chisels will allow for most carving and decoration, and further additions should be variations of these basic shapes e.g. different widths.
ring and dot tool:
This is a very unique tool that creates a particular pattern, and while it is not very common now, it has been a very widespread decoration in the past and is used on objects from the Iron Age onwards, and as such no early mediaeval bone worker should be without at least one.
Note:
One last thing about both of these resources is to make sure it’s fair for what you do. If you’re making reasonably delicate objects, or you don’t have access to vices or clamps, then tiny rough rifflers, needle files, and so on, are much better at working than a big surform that will knock your finger off if you slip. However, to make things a lot easier, I do suggest that you at least have a small bench mounted vice for roughing out, as it will save a lot of trouble in the long run.
If you want to be best at bone carving and learn some beautiful techniques read “Bone Carving by Stephen Carving”.