

Carving becomes more fun when you do for it little kids, nothing is more valuable to a kid than a toy of his/her dream, what if you can build them the toy of their dreams; from a super action hero figure to a sweet little barbie doll, from a puzzle to a skateboard? You will be the best figure for the child, I bet!
Carving toys is not as difficult as making sculptures and well-defined précised art, it can be very easy only if u have passion enough to make your kids happy.
Here we will show you how to make two different toys from scratch, so you can make yourself the similar kind of toys.
Contents
The Tangram puzzle:
Step 1: What You’ll Need

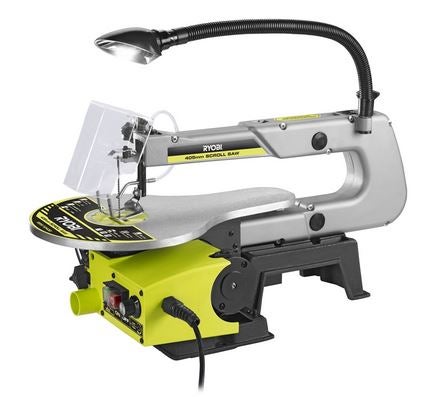
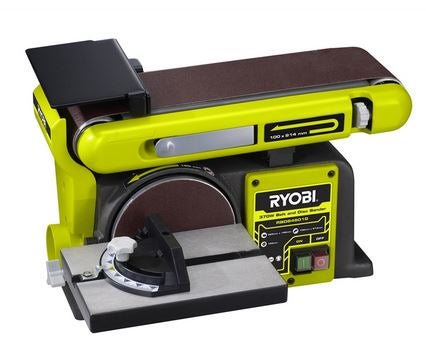
Scrolling Saw Sanding Machine
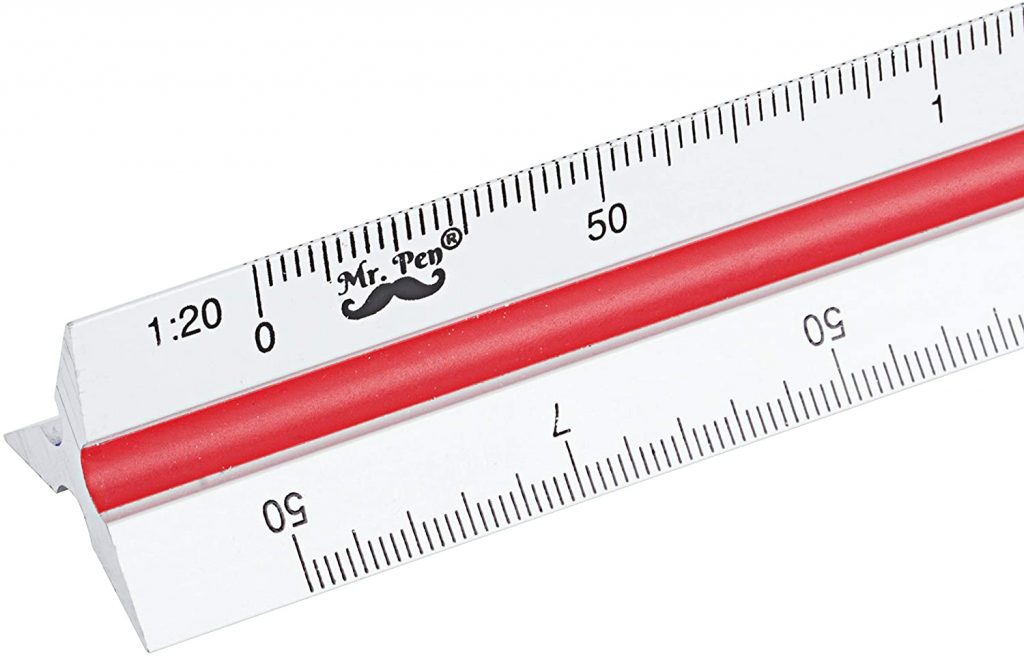
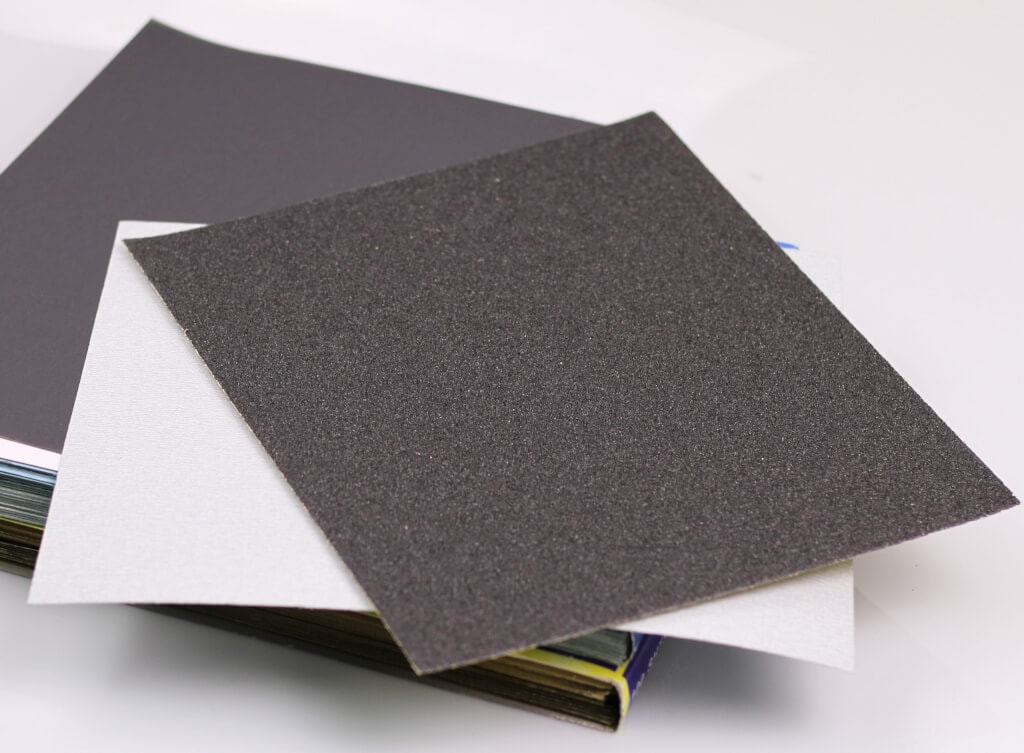
Ruler Sand Paper Coping Saw
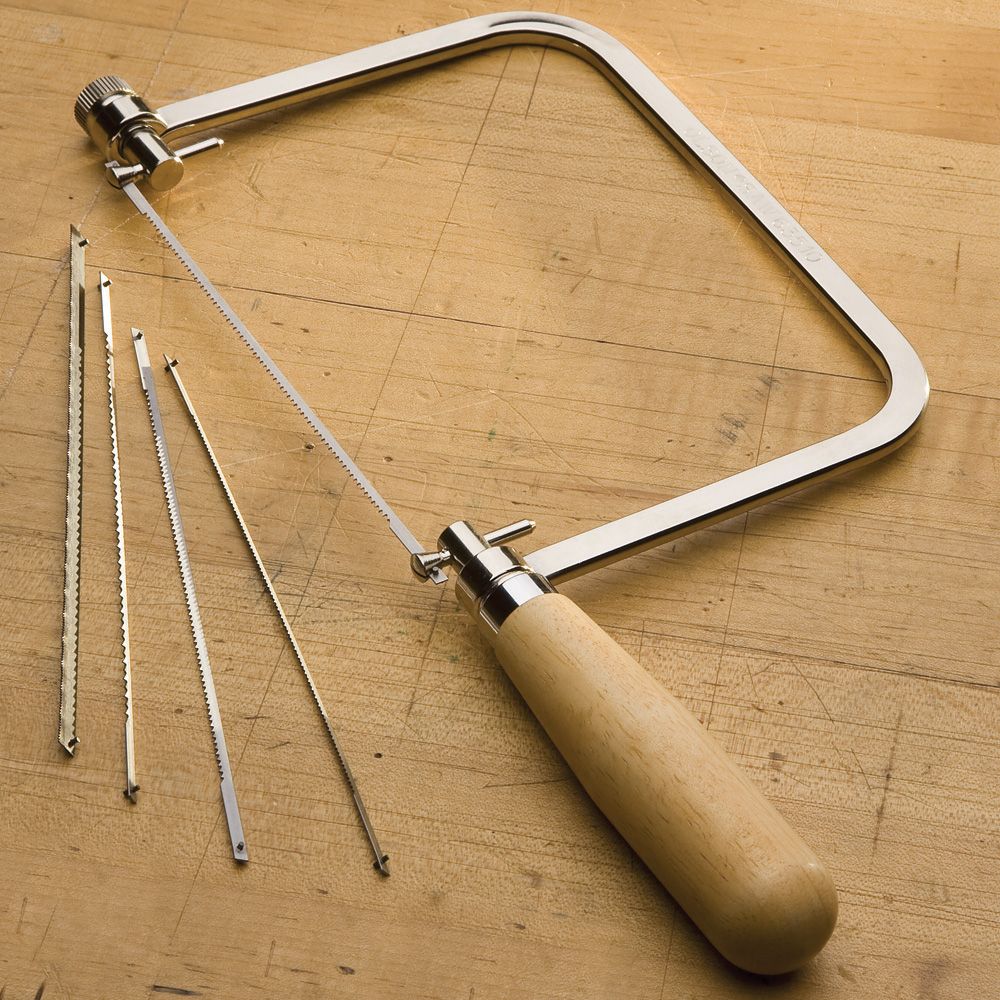
- Scroll saw or coping saw
- Sanding machine or sandpaper
- Pencil
- Ruler
Step 2: Drawing It Up/planning

You can print off this template to use, or draw up your own. If you’re drawing up your own, here’s what you’ll need to do.
- Get some scrap wood or a piece of paper, 15 x 15 cm.
- Draw a border all around, 1 cm out from the edge.
- Draw a line from corner to corner, and another one crossing it from the other corners. You now should have a large x across your wood/paper.
- Now, draw a straight cross through the middle of your material. It should now look a little like the Union Jack.
- Draw a diagonal line through three of the quarter squares, then one along the middle of the top half of your material.
- Now look carefully, and carefully compare your drawing with the template above. You should be able to identify the shapes.
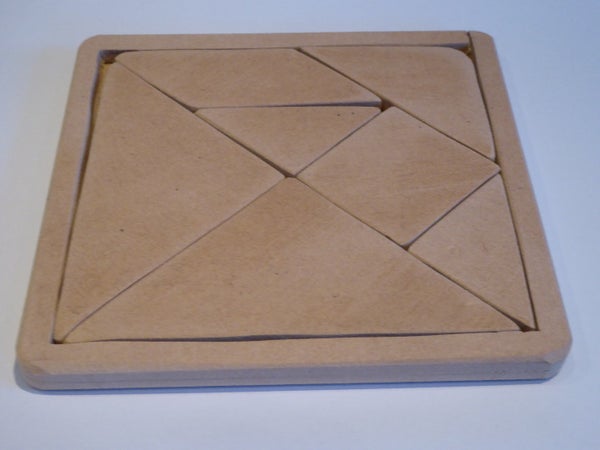
Step 3: Making the Base
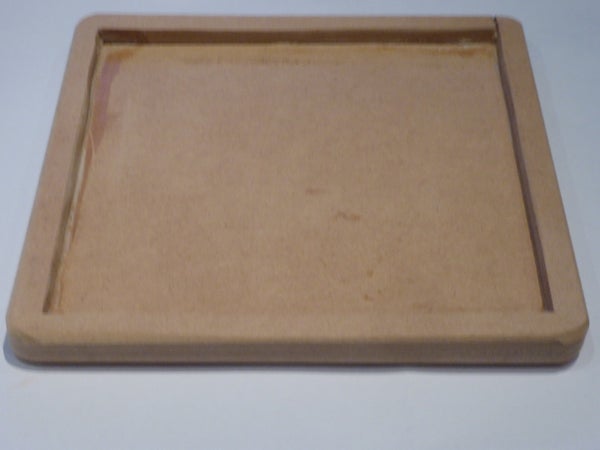
- Get two pieces of wood, 15 x 15 cm, (MDF will do), and draw a border 1 cm in from the edge of one of them, if you haven’t already from the steps above.
- Cut all around the border, staying straight on the line.
- Glue the two pieces together, and clamp them. Wait until the glue is dry to take off the clamps.
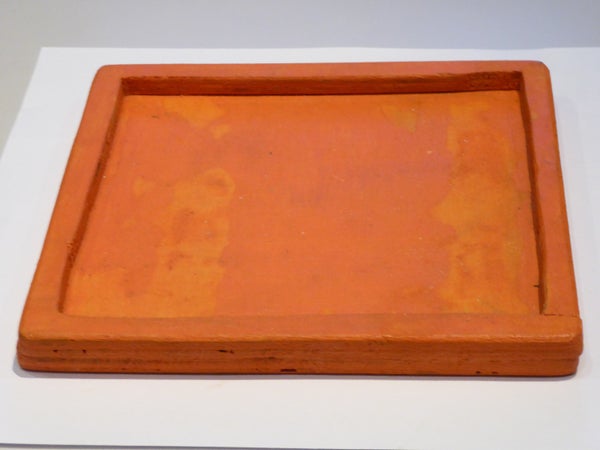
- Paint it a bright color, and you can wipe off some of the paint if you wish to give it a slightly rustic old fashioned look.
- You have made the base for your tangrams puzzle!
Step 4: Making the Pieces

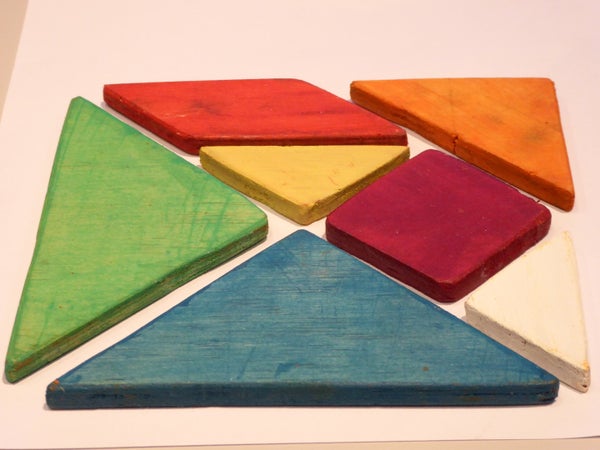
- Using the wood you cut out from the top layer of the base, follow the first steps to draw the shapes onto the wood if you haven’t already.
- Cut carefully along the lines of the shapes, and sand them carefully.
- Paint it a bright color, and you can wipe off some of the paint if you wish to give it a slightly rustic old fashioned look.
- You have made the shapes for your tangrams puzzle!
Step 5: Done!
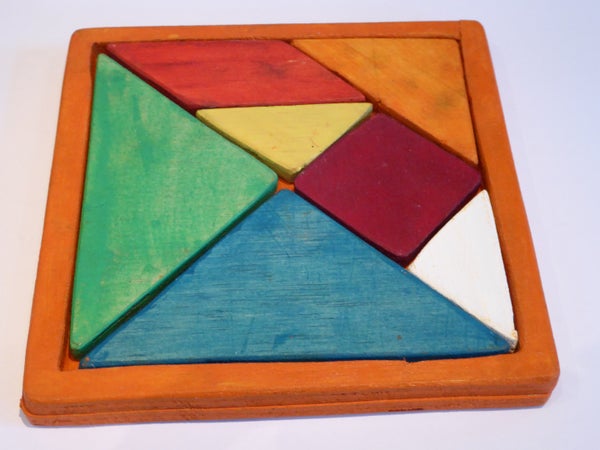
When all the paint and glue have dried, fit the shapes into the base to reveal a colorful tangram puzzle!
Step 6: Now You Can Make Cool Shapes!
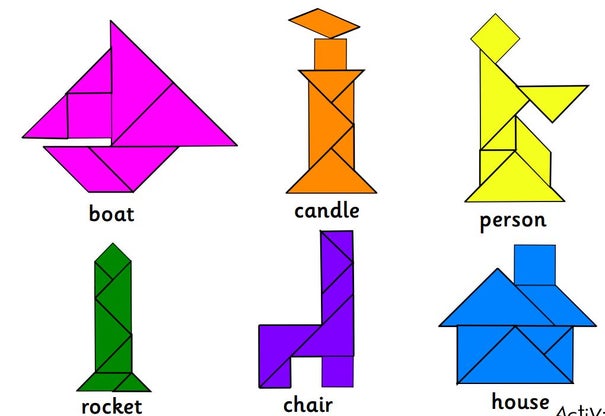

Now, you can fit the shapes together to make loads of cool shapes and things! Here are some ideas.
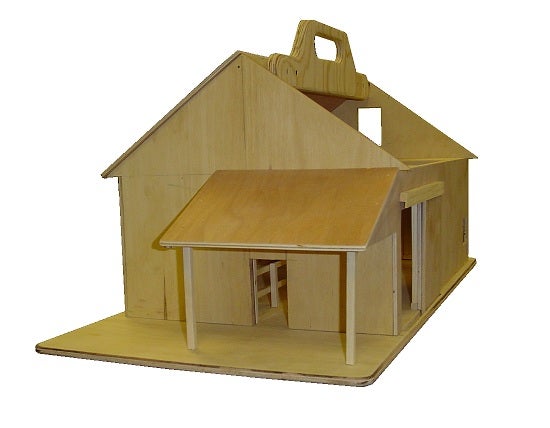
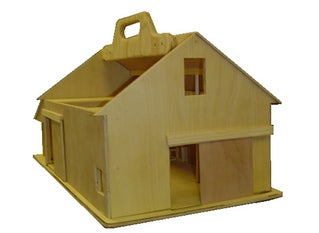
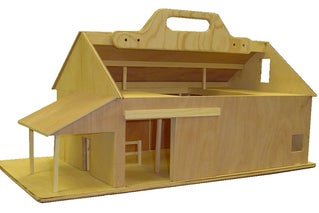
The Barn Toy:
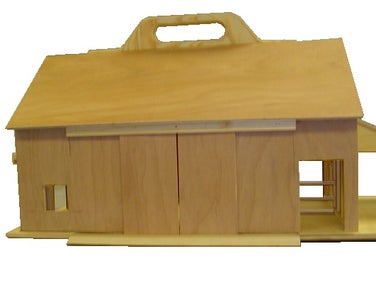
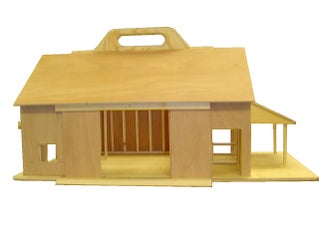
- Step 1 – Size: get measurements of the barn and scale down to a manageable size (this project 1 inch = 1 ft).
- Step 2 – Material: Plywood -1/4″ birch, the size will depend on the project, wood scraps for the base and handle and inside beams and post, brads or small nails, gorilla glue, and a few screws.
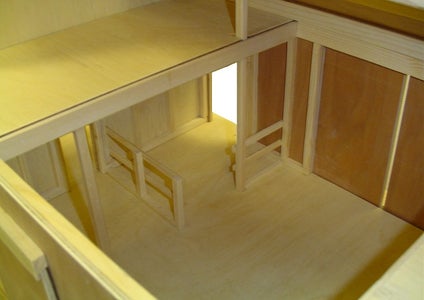
- Step 3 – Lay it out: Layout all components (end wall, sidewall, roofs, doors, and base) cut, trim, and sand as needed.
- Step 4 – Layup: Place sidewalls and place top, bottom and end beam (cut 1/4″ x 1/4″ square dow and glue into place) let it dry.
- Step 5 – Set it up: set end walls to sidewalls, check the fit, square up, glue and clamp, glue end wall top, bottom beams (let it dry).
- Step 6 – Door: Set doors for movement may need to router slot in the base for small doors or add ramp (same as a double door).
- Step 7 – Apply to Base: Secure assy to base and glue, nail to base.
- Step 8 – Second floor: Add cross beams and set platform (don’t forget that Gorilla glue).
- Step 9 – Top handle: set oversized beam on top center glue and nail for support, place handle.
- Step 10 – Finish: place smaller upright beams in place.
Ready for paint!
Enjoy!