
These aren’t just wood carving tips; they’re fundamentals that you’ll carry with you every step of the way.
You’re beginning the wood carving journey from the same place that we began. The same place that everyone started out at.
By remembering or writing down these tips, you’ll start out on the right foot with wood carving and get right into it without missing a beat.
Before we lay down the tips and then get into our overview of a proper introduction to wood carving, just keep the core tip in mind: you need to allow yourself to make mistakes.
They’re going to happen. Some pieces of wood might get ruined, some designs might come out lopsided; it’s all okay. You don’t have to be perfect right away.
Now, let’s get to the fundamentals.
Contents
7 Tips for New Wood Carvers
#1 Understand Different Wood Types Before Starting
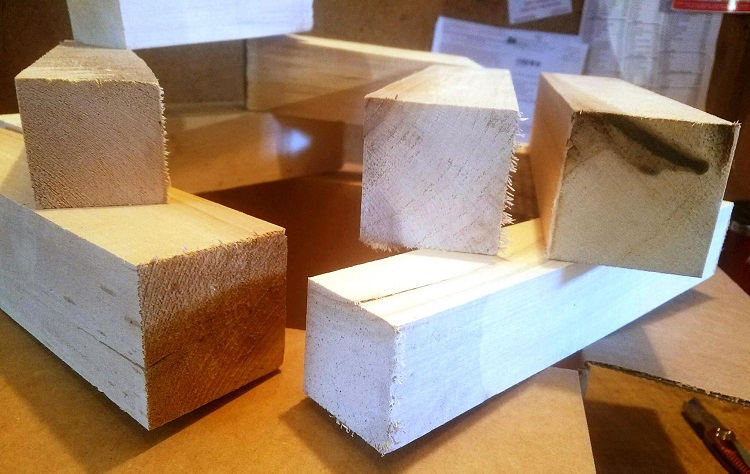
Before you ever bring a chisel or knife to the edge of a block, you need to know what you’re working with.
There are only so many types of wood available for wood carving, and each of them has differences that are important to know.
For instance, pine is cheap and technically a softwood, whereas oak is pricier and a hardwood. Softwood is surprisingly easy to injure yourself on.
It’s common for there to be more knots in the wood that catch the knife, so you apply extra pressure, and then the wood comes away and your finger is caught in the crossfire.
For reasons like that, as well as how difficult some woods can be to work with/if they’re viable for your long-term projects, you have to do your homework.
Some wood types will strictly be used to practice on or make knick-knacks, and others will be turned into end tables and that dining table that you’re going to pass down through generations.

#2 You’re Never at Your Best
It might not sound too motivational, but it is.
Wood carving, or any other intricate and complicated skill is usually compared to learning how to play guitar.
With guitar, there’s this skill plateau that people usually hit well before they’re at where they want to be. This is frustrating, and it happens in wood carving as well.
It’s okay to accept the fact that you are never at your best; you will always get better.
There will be stagnant periods along the way, but during those tough times, this is an important tip to remember.
Whether it’s about dexterity or you can’t scale up those designs properly, you’re going to get through it.
As a matter of fact, this next tip is going to come in handy when you’re trying to get proportions right.
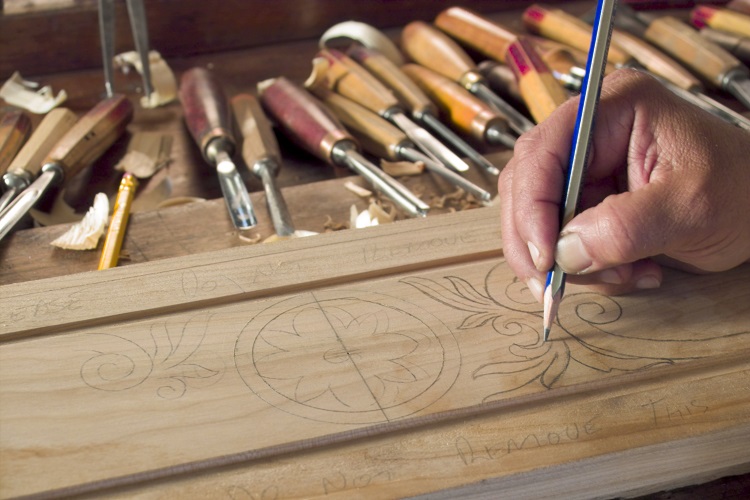
#3 Proportioning

It’s not easy. Whether you’re carving a gnome statue or a desktop wooden figurine, it’s not easy to proportion.
Even if you can proportion just fine on paper with a sketch or some art, it’s not necessarily going to transcend over to wood carving (it will help, but only so much).
This is because, if you were carving a face out of a log, you’re going to naturally make it disproportionate on one side.
That’s because we all have a dominant side. Even ambidextrous people will use one side over the other a little bit.
If you use your non-dominant side to outline and begin the process of carving, you’ll be able to finish it with your dominant side.
#4 Have a Dedicated Space
For anything that requires focus, you need a dedicated space. Don’t just say, “Well, it’s my new hobby, I don’t want to burden anyone by taking up space.”
That doesn’t cut it. You need somewhere to do this, especially when it comes to electric tools and sharpening your wood carving kit.
In the beginning, you’ll have small tools that can be put into a wrap and perhaps a very small toolbag. It won’t be a ton of space to take up.
#5 Learn Wood Burning at the Same Time
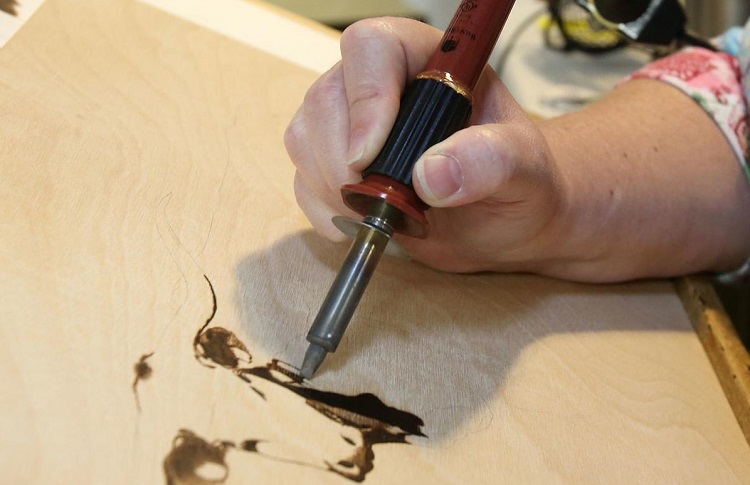
Wood burning is ridiculously easy to pick up, and it’s the perfect augmentation for your carved art pieces.
Use it to accent what you already have going on. Did you carve a tiki face into the side of a planter like we have laid out in our beginner projects below?
Great—enhance it. It’s a great skill to add on and bring your carvings to life.
#6 Never Start Angry
As we discussed earlier, it’s easy to get frustrated when you plateau while learning any new skill.
That being said, you should never go to wood carving as a form of anger relief. Stress relief when you’re calm? Sure thing; it’s great for that.
However, it’s not recommended to enter this space with a clouded mind. There are a couple of reasons for this.
For one, you’re putting your safety on the line. You’re handling very sharp blades right next to your fingertips. Your mind has to be sharp.
Second, you’re going to make garbage or ruin a project that was already going well.
That’s just going to make you angrier. Use wood carving when it’s enjoyable and there’s a desire to do it, not as an alternative to being upset.
#7 Make Abstract Art
You never know what you’re creating until it’s finished. You’re always one small mistake from ruining the vision (and subsequent hours of work).
Now don’t get us wrong, it’s good to go into this with an idea of what you should be making. Otherwise, how would you tackle intricate projects?
But it’s also good to just pick up a scrap block of wood every once in a while, and freehand it. No vision, just whittling or carving for the love of it.
You’ll find that you either just add to your experience with handling these tools, or you make something fantastic.
If you stop and realize you’re making a plaque and didn’t even know it, then you can change course and finish that plaque. Let it take you wherever.

Introduction to Wood Carving
Wood carving isn’t something you just fall into; you go in headfirst.
This skill goes hand in hand with woodworking, though few people make the connection between the two.
If you’re using planers while woodworking, then you’re carving. Anything that doesn’t add function but adds a bit of aesthetics (and takes wood away) is wood carving.
You’ll also find that wood-burning will become a useful skill that can amplify your carving projects.
So what could we really tell you about woodcutting for a proper introduction?
The facts. Wood carving is a solemn skill, it can be time-consuming, and it isn’t a career path (for most).
Wood carving is all about using your hands, turning something into a work of art, and showcasing your skills for personal reflection.
It’s a way to eat up time while transforming seemingly dull pieces of wood into art.
Make no mistake, this is art.
The wood carving comes with some minor dangers since you’re handling blades, but other than that, it’s a fairly peaceful way to let the time pass by.
To get you started, there are three main things in wood carving that you need to know.
Whittling: this is when you bring a knife to wood and slowly, with slices, remove the excess wood to get the size and shape that you want for your vision.
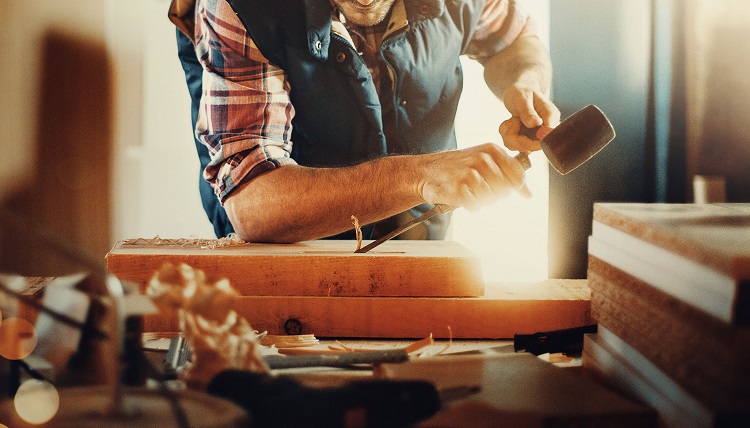
Chipping: a mallet is brought to a chisel to slowly and tactfully remove chips of wood to shape your materials.
Power carving: using a sawzall or dremel to shave away the wood. Power carving is more of a commercial thing and tends to take some of the fun out of wood carving in the first place.
You’ll end up coming into contact with all three different types over time. Just keep those fundamental tips in mind, and you’ll be fine.
Wood Carving Tools You Need to Know About
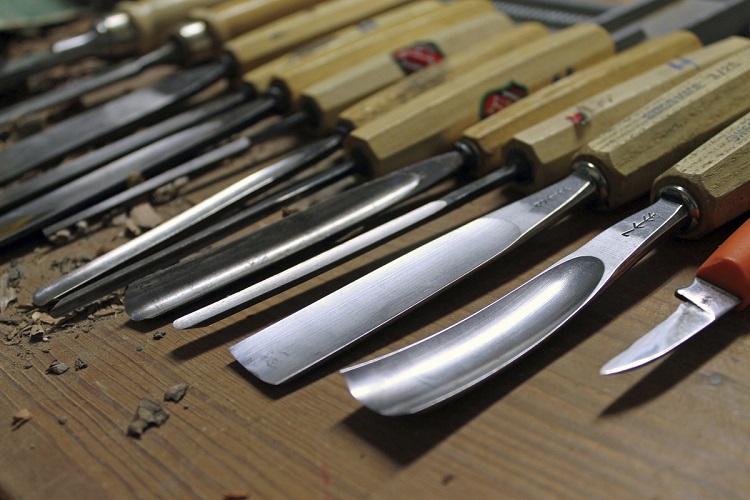
You’re going to need a small arsenal of tools to get the job done.
These are the most common wood carving tools that you can’t live without, at least if you want to produce excellent pieces.
These are all manual tools. Pneumatic tools, like wood dremels, are useful in wood carving but require less skill and intricacy to manage.
This is a hobby where power tools rob you of quality time spent carving.
- Carving Knife: Carving knives are designed to give detail and help you shave away wood. They generally have long handled with ergonomic designs, and a short but sharp blade on the end to help dig into the wood. They are often confused with whittling knives.
- Whittling Knife: These can be used by themselves, whereas carving knives are usually used in tandem with others. Whittling knives can be used alone to shave down wood (much like you’ve seen in movies), and create solid, single-piece items like wooden spoons.
- Wood Chisel: With a blunt wooden handle and an angled chisel end, these are used with a mallet to chip away pieces of wood from your project. Lean them at an angle and cut away small bits of wood at a time. You’ll see a similar look to wood chisel finishes that Willow Tree figures have; very geometric and rough, but beautiful.
- Veiners: Ever see calculated divots in wood, such as “veins” in wooden table legs? Veiners are exactly what you’d expect them to be. They shave away wood with pressure and a sharp edge to give intricate design, and in some cases, more function. You can use a veiner to scrape around the inside of a wooden bowl project to help carve it out without the use of power tools.
- Gouge: Without the need for an accompanying mallet, you can use these to literally gouge out bits of wood from different areas of your project. These help with the rough beginning when you’re trying to turn a wood block into something shapely.
- Detail Knife: The final piece of the puzzle. Detail knives are thin and razor-sharp, and often require a steady hand if you’re going for intricate detail.
What have you already acquired for your wood carving journey? Grab your manual tools and master them before adding any pneumatics to your collection.
Some Simple Wood Carving Projects to Get Started On
Designing a Picture Frame
This one doesn’t take a ton of skill to get it right, you just have to have about 15-20 minutes.
Using nothing more than a detail knife from your wood carving kit, you can buy an unfinished wooden picture frame, and customize it.
Carve designs or elegant lettering into it for personalization. You can make it a meaningful gift for someone you love, or simply as practice.
Tiki Head Planters
It’s a bit more intricate, but all you really need is a cut log about two feet high.
Use a circular saw to carve out in the interior so you can, you know, actually, put dirt and plants inside.
Leave almost all the bark on, but get an oval-shaped section on where the front of the planter would be, and that’s where you’re going to carve your face.
You can look at traditional Hawaiian designs if you need a touch of inspiration. These are lengthy tasks, but ones that will surely show you where you are as a woodcarver.
Wooden Spoon
All you need for this one is a whittling knife.
Get started by shaving down the bottom of the wood to make a handle, and the wider end for the spoon; carve out at much of the interior as you can.
These make great gifts for cooks or bakers that you know and will work well with another project on this list.
Arrow Shafts
Are you into archery?
You really should be; they were all crafted by wood carving once upon a time. You couldn’t make these from machines back in the day.
You can usually just do a quick foraging session in the woods to find thin sticks or pieces of wood to start carving up.
To complete these and make them into arrows, you’ll need to find a source for arrowheads and possibly turkey feathers (cheap and used in many professionally made arrows).
Spoon Rest
That wooden spoon you just made needs somewhere to rest on.
You can simply carve a spoon rest out of a dull block of wood that’s leftover from a construction project or scraps at the hardware store.
You can usually go into one and just say that you need scrap pieces; they’ll be cheap.
Since most hardwood stores will cut lumber for contractors, they have odds and ends laying around. It’s a good way to source wood for other projects as well.
Plaque
One slab of wood, a chisel, and a detail knife. You can make something fantastic here. It’s also recommended to have a pencil for tracing.
Get a 4” x 5” slab and measure the frame of it. Find out where to place the letters, and make a “Best Dad” or “Woodcarving Station” plaque to hang somewhere in the house, or give as a gift.
These are super simple to make, and they also work well with wood burning.
You just have to get the letter outlines right, and then trace it. You can scale up these projects with your skill level.
Add a more intricate design to the edges, make the letters in cursive, or whatever comes to mind.
Scale Up As Your Go
With all of these beginner projects, you’re not limited by simple designs. You can make something ordinary and turn it into something extraordinary.
Add extra elements, more divots, and find out how to use that chisel to make triangular holes (they look awesome every time).
Add an engraving to a wooden spoon, or turn a birdhouse into a miniature mansion with attention to detail. It’s up to you.
Once you get about half-a-dozen projects in the books, you’ll be ready to tackle something bigger.
You’ll Only Get Better Once You Begin
Beginner tips are soon going to be fundamentals to you.
You’re on your way to being a master woodcarver.
Do you know all those intricate pieces of art carved in a slab of oak or the oversized benches and furniture carved from an entire tree trunk?
All of those woodcarvers came from the same place you are: the beginner’s circuit. Everyone is a newcomer until they aren’t.
Use these tips and tricks to further your knowledge, put them into practice, and earn that title of expert.
Tomorrow, someone else will be beginning their wood carving journey, but you’ve got today—get the best wood carving kit that you can budget for, and just begin.
It’s easy to start, but it’s hard to keep going. Where is this newfound hobby going to take you?